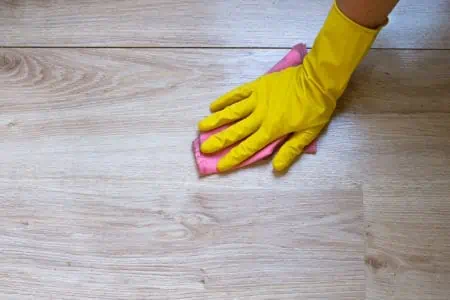
Did you scratch your laminate floor and dread the idea of having to make costly repairs? Wondering if you have to replace the whole thing?
Good news! In most cases, you can repair scratches and other types of floor damage without having to spend a fortune. Learn how to fix scratches on a laminate floor with these easy methods.
Key Takeaways
- Scratches on laminate flooring can be repaired using wax pencils, putty, or touch-up markers.
- Match the color of your laminate floor with the repair material for the best results.
- For severe scratches, you may have to replace the damaged laminate plank.
- Prevent scratches by using furniture pads, trimming pet nails, and placing rugs in high-traffic areas.
Can Scratches on Laminate Flooring Be Repaired?
Before I teach you how to remove scratches from laminate flooring, you need to be realistic in your expectations.
Laminate flooring is a multi-layer synthetic substance laminated together, usually with a high gloss finish. The top layer is made of durable plastic designed to withstand daily use.
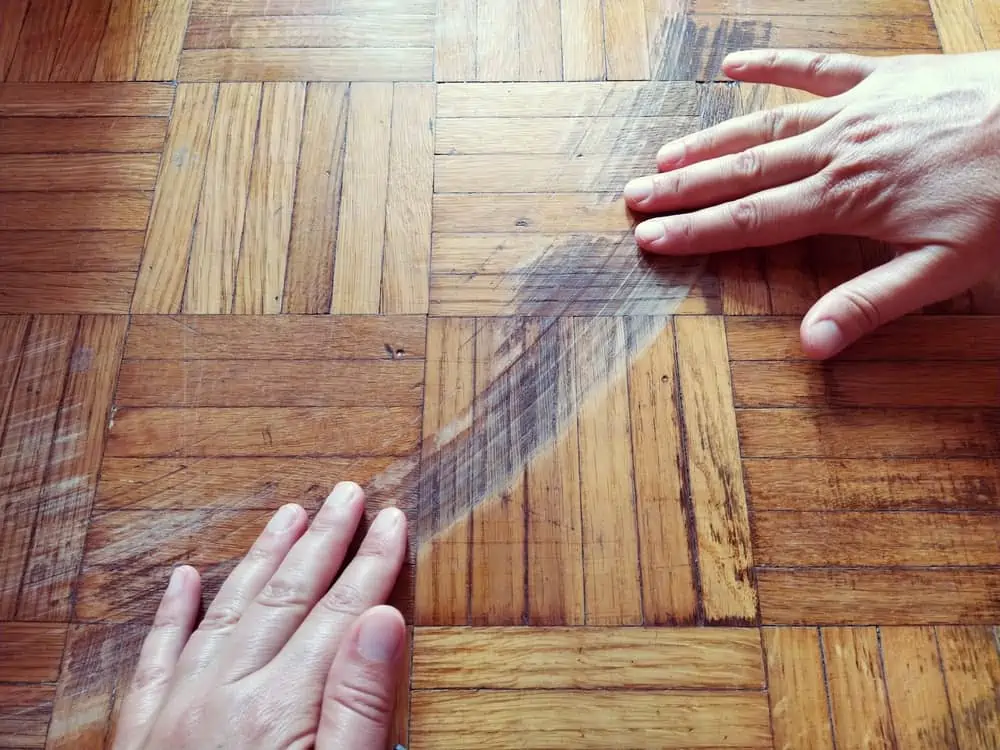
While laminate flooring is fairly robust and designed to last for years, it is susceptible to scratching and scraping. Due to the inability of the surface to be sanded, these scratches must be fixed with wax or putty.
There are some easy fixes if you’re dealing with lightly scratched laminate flooring, such as using a wax pencil to fill the scratch with wax. But things are a bit more complicated when it comes to deeper scratches.
Do you have deep scratches that go all the way through the top layer, revealing an almost white color? Putty or wax alone will not be sufficient to repair them. You will most likely have to remove and replace the board.
Best Laminate Floor Scratch Remover
If you feel the need to give your laminate floors a new shine, I’d suggest taking a look at some commercial products. I’ll give a few suggestions to get you started.
Inspired 150ml Laminate Floor Scratch Remover will instantly restore your laminate flooring to its original form by concealing minor scrapes and scuffs. The simple-to-use solution gives a layer of sheen to your floor surface.
When you’re dealing with deep scratches, you might want to take a look at Rejuvenate All Floors Restorer and Polish Fills. Along with efficiently eliminating scratches, it also adds a layer of UV-protective coating, ensuring that your floors do not fade. It doesn’t take longer than one hour to dry either.
Scratch Away Spray is designed to cover small scrapes and scratches on Pergo laminate and wood floors. It makes them less visible and doesn’t contain any wax or solvents.
Matching the Color
The secret to successfully repairing a scrape, dent, or scratch on laminate flooring is matching the floor’s color. Whenever feasible, contact the flooring manufacturer directly to obtain your repair kit.
Almost all laminate manufacturers sell repair kits that include putty knives, colored putty, and wax pencils. If you are unsure of the flooring manufacturer, consider bringing a sample to the store to obtain a repair kit that matches the color.
No Match Found
An alternative may be to purchase a repair kit that lets you create your hue of putty.
How to Fix Scratches on Laminate Floor
Here are some tips, depending on the method you decide to use.
Touch Up Markers
These products use liquid wax to fill up scratches and can be used to make minor repairs. After cleaning the floor, use one of these markers to “color” the scratch.
Pick one end to start and work your way to the opposing one. Use short strokes and move slowly to make sure you’ve covered the entire scratch.
Since applying more filler makes the color dark, use it scarcely to ensure you get an end color that matches the rest of the floor. Take a clean microfiber cloth and buff the edges when you’re done. This ensures the repair is concealed and blends in with the rest of the floor.
Wax Pencil
Using a wax pencil is the best option when dealing with minor scratches on your laminate floor. The idea is that you fill in the scratch with the wax from the pencil by rubbing it back and forth on the damaged surface.
Use short strokes to fill up the scratch. Use a soft cloth when you’re done to buff the edges, so the repair blends in with the rest of the flooring surface.
Putty
Should you notice a deeper scrape or scratch on your laminate floor, a wax pencil will not be sufficient to fill and restore it. Floor repair putty is an excellent product for moderate scratches.
Spread the putty on the scrape or scratch using a putty knife. Maintain a 45-degree angle with the knife to the floor and press the putty across the surface from different angles to ensure it is thoroughly filled.
Scrape the knife around the surrounding floor and the repair to level the putty and achieve a flat, even fix. Within a day, the putty will set and form a permanent repair.
Crayon
Who knew that shredding crayons and melting them in the microwave might produce a viable floor filler material? You will need a crayon that matches the color of your laminate flooring.
Make sure to melt the crayon in a microwave-safe basin and allow the melted crayon to cool down for a bit before applying it. Wipe the scraped surface clean before dabbing the melted crayon over the marks to cover them.
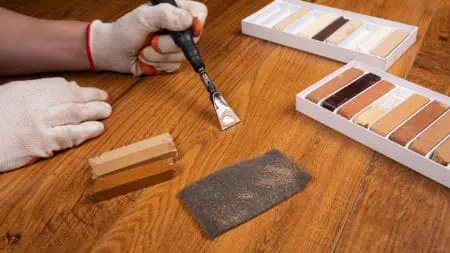
Burn-In Stick
Another option for repairing significant dents and scrapes in laminate flooring is to purchase a laminate floor repair kit. These often include a burn-in stick, which is a filler applied with an electric knife.
Safety First
Due to the potential of electric shock, sufficient safety precautions should be used when applying burn-in stick filling. You should read the application instruction booklet included in the product packing.
I recommend using the Mohawk Burn-in Stick. Simply warm the tip, rub it into the cracks or scratches, let dry, and sand.
Toothpaste
Toothpaste and WD-40 (a popular degreaser) are two more things that you can use to remove scuff marks and tiny scratches from laminate floors.
Simply dab one of these two products on the scratch marks until they vanish. Following that, remove any paste residue with water and vinegar.
Replacing the Plank
If the scratches on the floor are severe enough that the above solutions are ineffective, you can replace the afflicted plank with a new one. However, you must exercise caution when installing the new laminate floorboard to avoid damaging the neighboring planks.
What You Will Need
- Carpenter’s glue.
- Utility knife.
- Pliers.
- ½-inch drill bit.
- Drill.
- Chisel.
- Hammer.
- Circular saw.
- Pencil.
- Straightedge tool.
1. Cut the Damage Board
Draw a line from one edge of the damaged board to the other. Set up your circular blade saw to cut at a ⅛-inch depth further than the thickness of the board. If you have concrete subflooring, then it should be the same thickness as the board.
Put the blade into the previously-marked line, close to the center of the damaged board. Start cutting in the middle and proceed to one end of the board.
Repeat these steps to but to the other edge of the board. When ready, tap along the cut using a chisel and a hammer.
Repeating this entire process, you also want to cut the damaged board diagonally. You should be left with four triangles.
Using a pry bar and pliers, pull each triangle towards the center. Each of the triangles should snap loose. Remove the two centerpieces last.
2. Install the Replacement Board
To prepare the replacement board, cut off the groove bottoms on a side and one end. Cut the tongue at the opposite end. Using a utility knife, make the cuts and use pliers to remove the pieces.
Put carpenter’s glue on the tongues of the boards that are already installed on the floor. Make a note of where the intact tongue on the replacement board is and snap it on the groove of the board next to it.
Lower the replacement piece and press the edges. Weigh it down until the glue is dry.
How to Prevent Scratches on Laminate
Proactively protecting laminate flooring and caring for it will help extend its life and keep it looking attractive for years to come. Laminate floor maintenance does not have to be difficult.
Use Furniture Pads
Your furniture’s legs may leave scuff marks and scratches. To protect your laminate from scratches, you’ll need some felt and adhesive.
Purchasing felt and superglue from your local craft store is the simplest method to accomplish this. Adhere little pieces to the underside of your furniture. You may even find little discs that already have adhesive on one side, simplifying the process even further.
Little bits of carpet or rubber can be substituted if felt is unavailable. These materials are equally effective in preventing scratches and scuff marks on your flooring.
Regardless of how you utilize felt padding on the legs of your furniture, be sure to inspect them often. Occasionally, felt pads will break free and fall off, leaving your flooring once again vulnerable.
Careful with Claws
Due to the robust surface resilience, laminate floors are one of the greatest solutions for dog owners. Normal wear and play are tolerated due to the aluminum oxide topcoat. But it is critical to keep your pet’s nails clipped and groomed to avoid excessive damage.
Along with your pet’s nails, heavy toys or sharp edges should be handled carefully to avoid chipping or scratching the floors.
Add Some Rugs
Not only are rugs decorative, but they also act as a protective layer for your laminate floors. Consider adding them in high-traffic areas.
Invest in Plastic Flooring Pads
If you’re in an office setting and want to avoid scratches and wear on your laminate flooring, you’ll need to place protective mats beneath your caster chairs. This is a critical tip for laminate floor upkeep, as the product guarantee does not cover mechanical damage to the floor surface.
FAQs
That’s a Wrap
The best method to fix scratches on a laminate floor depends on the severity of the damage. While there are many fixes for minor and medium repairs, you have to be realistic for significant scratches. In these scenarios, your best option is to replace the laminate board entirely.