Have you spotted holes in the corner of the ceiling or even in the center? They’re often from hooks, or things once inserted there. But some holes are signs of a much deeper issue that needs to be addressed ASAP.
I will show you how to fix holes in the ceiling, what causes them, and how much it will cost you. You could easily hire a professional, but if you’re a DIYer, then follow along!
Key Takeaways
- Wear protective gear like safety goggles and a dust mask before starting.
- For small holes, cut a drywall patch, place it over the hole, and spackle over it.
- For large holes, cut and attach furring board strips, then attach the drywall patch.
- If the hole is caused by water damage, fix the leak and dry the area before repairing.
How Much Does It Cost to Fix a Hole in the Ceiling?
Fixing a hole in the ceiling as a DIY project should be really cheap, as you’ll only need to pay for the materials involved. If the hole is really small, you won’t even need drywall patches for it.
A drywall or sheetrock patch repair kit like this Boncart Wall Repair Kit costs $10 or less. If you have the other tools needed around the house, that’s pretty much all the money you have to spend.
How to Fix Small Holes in Ceiling
Before you learn how to fill holes in a ceiling, you need to figure out its size. To determine whether a hole can be classified as a small one, you will have to measure (or guess) its diameter. Small holes are usually smaller than three inches, while three to six inches is considered a medium-size hole.
Here are step-by-step instructions on patching ceiling holes that are considered small and medium.
What You’ll Need
- Safety goggles.
- Dust mask.
- Utility knife.
- Drywall patch.
- Spackle.
- Sanding paper.
- Scissors.
1. Wear Protective Gear
Because you’ll be working beneath the hole, it’s critical to safeguard your eyes and mouth against falling drywall debris and dust. Safety goggles are superior to safety glasses because they completely encircle your eyes.
2. Cut the Hole
Cut any drywall around the hole’s perimeter to tidy it up and eliminate any sharp edges. Clean the hole sufficiently to allow a drywall repair patch to rest flush against the ceiling.
Take Note
This works for small and medium holes up to six inches in diameter.
3. Cut the Patch
Take your drywall patch and cut a piece that’s one inch longer and wider than the hole itself. This should leave you with 0.5 inches of extra material on all sides.
Quick Tip
If you’re dealing with a hole that’s smaller than half an inch, you can fill it with some spackle. There’s no need for any drywall patches.
4. Patch the Hole
The protective backing on the adhesive side of the drywall patch should be peeled away. To ensure that the patch adheres, center it over the hole and firmly push it against the ceiling on all four corners.
5. Spackle the Patch
Take a putty knife. Apply a fine layer of spackle over the patch. You have to apply multiple layers to cover the patch completely.
It takes about one or two hours for the spackle to dry. Allow the first coat to dry overnight.
6. Sand the Patch
Sand with a piece of 120-grit sandpaper mounted on a sanding block or by hand. Lightly sand the entire patch until it is uniformly smooth. Sand very lightly around the patch where it meets the surrounding ceiling to blend the spackle into the rest of the ceiling.
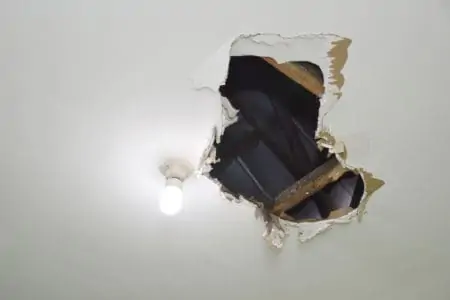
How to Fix a Large Hole in Ceiling
Holes that exceed six or seven inches in diameter are normally considered large holes.
What You’ll Need
- Safety goggles.
- Dust mask.
- Drywall saw.
- Drywall patch.
- Spackle.
- Sanding paper.
- Pencil.
- Scissors.
- Two furring board strips.
- Drywall screws.
- Electric drill.
1. Cut the Drywall Patch
After putting on all your safety gear, cut a drywall patch that’s two inches longer (on all sides) than the hole in the ceiling. Place the patch on the ceiling, centered on the hole. Using a pencil, mark the outline of the patch.
2. Cut the Hole
Take a drywall saw and cut the ceiling following the traces you previously made.
3. Cut the Boards
Take two strips of furring board (thin strips of wood used to raise or level certain surfaces) six inches longer than the hole’s width. These boards can be found at home improvement stores. You can use a hand saw, or whatever power saw you have available to cut them.
4. Attach the Boards
Insert the strips at the ends of the hole. You want the ceiling to overlap about ¼ of the boards on the sides.
Take an electric drill and insert drywall screws through the ceiling and overlapping boards. Do this for both ends.
5. Attach the Patch
Put the patch over the hole and press it against the furring boards. Place drywall screws through the patch and into the board with three to four inches of spacing between each.
6. Spackle and Sand the Patch
Apply spackle on the patch and let it dry for one to two hours before applying the second coat. Sand the surface when the spackle has fully dried.
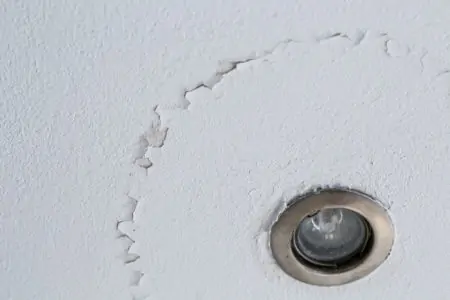
How to Fix a Hole from Water Damage
It’s crucial to identify the main leaking source before learning how to fill holes in the ceiling caused by water damage.
Water can travel a startling distance from the source of the leak, and roof leaks are especially difficult to isolate. Even in seemingly straightforward situations, there are a variety of possible sources of water.
You may need to make a hole in the ceiling to determine the source of the leak. And if you’re having difficulty locating the leak, you can attempt the traditional trick of putting sheets of toilet paper along ceiling joists and pipes.
Toilet paper will readily demonstrate any reaction to wetness, helping you to focus your search.
What You’ll Need
- Tarp.
- Fans.
- Towels.
- Protective gear.
- Keyhole saw.
- Sandpaper.
- Joint compound.
- Measuring tape.
- Drywall sheets.
- Paint.
- Primer.
1. Stop the Water Leak
Locate the main source of the leaking and stop it. You might even have to remove damaged drywall portions to identify the source in certain situations.
2. Dry the Ceiling
When you’ve stopped the leak, you can proceed to dry the surface. Put a tarp on your floor or furniture. Grab as many towels and fans as you can. Pat the wet surface and direct fans at it to fully dry.
3. Remove Damaged Parts
Safety First
Wear your face mask and safety goggles.
Scrape parts of the ceiling that have water stains or show signs of peeling or bulging. Take a keyhole saw and cut the damaged sections. Make the cuts square or rectangular, as they will be easier to fix.
4. Repair the Surface
Smooth down any bumps or rough areas. If you notice small holes, fill them with joint compound, allow it to dry, and sand it.
If you need to cut out larger pieces of the drywall, measure the hole. Choose a drywall sheet that matches the size of the hole but is two inches wider and longer.
Patch the hole, allow the adhesive to dry, add joint compound, and sand it down again.
5. Prime and Paint the Surface
Once repairs are complete, open windows to allow sufficient ventilation during the priming and painting process. Allow the primer to dry on the ceiling. After the ceiling has dried, you may repaint it.
Ideas to Cover a Hole in the Ceiling
If you don’t have time or simply don’t want to learn how to patch a hole in the ceiling, here are some quick temporary fixes.
Tapestry
There are several tapestries to choose from. Images of plants and animals, Celtic and Persian motifs, religious icons, musical instruments, and modern abstract designs are just a few examples.
Ceiling Medallion
Polystyrene foam medallions have replaced plaster ceiling medallions in recent years, yet they still appear like plaster. Foam ceiling medallions are less expensive, lighter, and easier to install because of their lightweight design.
Plastic Stars
Transform your ceiling into a night sky filled with shimmering stars. One star should be placed over the hole, and the rest should be dispersed across the room.
A genuine night sky can be re-created by arranging stars in various patterns, from clusters to more open dispersion.
FAQs
Sometimes it helps ease our minds when we see what questions others are asking. Here are some of the most common ones I get.

What Causes Tiny Holes in Ceiling?
Tiny ceiling holes are typically caused by termites, rodents, water damage, or low-quality ceiling materials.

What Does a Termite Hole Look Like?
Exit holes from termites are round in shape and about 1/8 of an inch in diameter. As soon as the alates (swarmer termites) have left the nest, the termite nymphs will close the openings with frass paste.
There are very few holes in the wood because the holes are swiftly plugged, making it difficult to find them.

When Should I Be Concerned About Ceiling Cracks?
If you find large fractures in the ceiling, this is a good sign that the structure of the building needs repair. Some warning signs include many cracks, cracks accompanied by sagging, deep cracks, or cracks that are thicker than 3 mm.

How Do You Fix Holes in a Popcorn Ceiling?
Fill up the hole left by the hook by removing it from the ceiling and using a drywall joint compound to repair the damage.
Apply popcorn ceiling repair spray to match the existing texture of the ceiling after the joint compound has dried. Make sure the repair spray is completely dry before applying a coat of ceiling paint.


How Do You Fill the Gap Between a Light Fixture and Ceiling?
If you’re dealing with gaps from light fixture installations, you can simply install a stylish light trim kit or ceiling medallion. Or, if the gap is minimal, try filling it with a bead of caulking.
Wrapping Up
Learning how to fix holes in the ceiling is easy, but that doesn’t save you from identifying the cause. Dealing with a termite infestation or water damage? You have to address the source before proceeding with ceiling hole repair.