Air-drying is an effective way to season wood, but it is slow. Different species of lumber react to humidity, plus the moisture levels existing within the wood, as well as the thickness, means that the drying times vary significantly.
We explain the different techniques to help you get the desired results faster. Join us as we show you how to dry wood fast for woodworking.
Key Takeaways
- Use a moisture meter to check wood’s dampness before starting a project.
- Properly stack and space wood with stickers to allow for air circulation and faster drying.
- Consider drying wood indoors, in sunny and windy spots, or using a dehumidifier or fan to speed up the process.
- Seal the ends of wood logs to control moisture release and prevent cracking and shrinkage.
How To Know if Wood Is Dry Enough for Woodworking?
Using green lumber is possible when constructing with wood, but because the moisture content is high, it takes a long time before the wood dries out. That means you get warping, cracking, and uneven joints.
Knowing the drying times for each wood species would be a great place to start if you want to ensure the wood you have is dry enough to use.
| Wood Species | Drying Times (days) |
|---|---|
| White ash | 60-200 |
| Aspen | 50 to 150 |
| Basswood | 40 to 150 |
| Beech | 70 to 200 |
| Yellow birch | 70 to 200 |
| Butternut | 60 to 200 |
| Black cherry | 70 to 200 |
| Elm | 50 to 150 |
| Hickory | 60 to 200 |
| Red maple | 30 to 120 |
| Hard maple | 50 to 200 |
| Red oak | 70 to 200 |
| White oak | 80 to 250 |
| Sycamore | 30 to 150 |
| Black walnut | 70 to 200 |
| Yellow poplar | 40 to 150 |
One of the biggest factors in drying wood is the method used and the type of wood you have. Hardwoods take a lot longer to dry out compared to softwood, like pine. However, when you are constructing a building and using a wooden frame, you are unlikely to use pine because it lacks tensile strength.
How To Dry Wood Fast for Woodworking
Let’s take you through the various ways you can achieve dry wood suitable for use in woodwork projects. For this exercise, we are assuming that the air-dry method is the one to use.
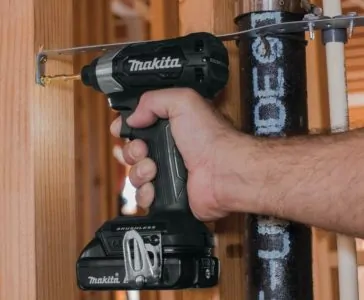
1. Buy a Moisture Meter
Moisture meters are hand-held devices with probes that react when they make contact with damp surfaces. You can use them inside your home if you suspect there is a damp issue.
When you purchase your new lumber, it is a great idea to touch the probes against the surface of your wood to get accurate moisture readings. If the reading is above 7 percent, you will need to allow the wood to dry before starting any projects.
2. Drying Your Wood
Lay down a row of stickers on the ground. Stickers are pre-dried lengths of wood, typically 4 x 2. Space the stickers about 16 inches apart. This raises the wet lumber off the ground and allows air to circulate to dry the wood faster.
Without an elevated base, you risk the wood becoming wetter as it makes contact with the ground. You will need to ensure there are enough stickers to form a supportive base, and the number will vary depending on how much wood you have to dry.
3. Lay the Boards
Start laying the boards, so they run perpendicular with the stickers. Allow a 1-inch gap between the boards, again to let the air circulate. The more air you allow to flow, the faster the wood dries. The basic principle of this method is to reduce the amount of surface contact the wood makes with the ground and the other boards.
4. Repeat the Process
After you space and lay the first set of boards, grab the stickers and place them on top in the same way as before. Then lay the second set and so on, repeating the pattern, so it goes boards, stickers then boards.
If you don’t add the extra layers of spacers between the boards, you will restrict airflow and slow the drying process.
5. Weigh It Down
Once your stack is complete, you will need to weigh it down. As the wood dries, it changes shape, warping, and twisting. Weighing it down prevents any movement, allowing the wood to dry straight.
You can use cinder blocks or bricks to add extra downward pressure. If you store the wood outside, it is also necessary to keep the wood dry from the elements. Grab a large sheet of plyboard and lay it on top of the stack, making sure it covers entirely. Now lay the cinder blocks on the plyboard to keep the wood from warping.

6. Stay Patient
If you have followed all the steps above, your wood will dry, but how fast depends on several factors. The ambient temperature where you live, the sunshine levels, the humidity factor, and rainfall all play their role in how quickly your wood dries out.
The good news is that by using this method, you should ensure it dries fairly quickly, but the type of wood you have might also make a difference. Hardwoods take longer to dry compared to softwood.
In some cases, you might be waiting up to 200 days.
Top Tip
Dry more wood than you need to complete your project. That way, when you need it, you will have a ready supply to work with instead of having to wait while you dry more for the next project.
Tips for Drying Wood Faster
While you will reap the benefits of using the air-dry system, there are other ways you can speed up the process. Here are our top tips for drying wood the faster way.
Dry It Indoors
If you have space, try drying your wood in the warmth of your home. The temperature is controlled inside, wood doesn’t get subjected to the elements, and you can use heating and the warmth from the sun through your windows to help with the process.
The other advantage is you are not laying the wood on a damp floor. You would still need to employ the same stacking process, especially the spacers, and weigh it down. The downside of drying wood indoors is the odor. Wood can be quite smelly.
The ideal place to dry wood is in the garage, where the odors won’t affect the inside of your home. You could invest in a quality garage heater to create the dry heat needed to remove the moisture from the wood.
Choose Sunshine and Wind
If you are forced to dry your wood outside because you have limited space, where you choose to make your stack is crucial. Choose somewhere sunny, so if you have a southerly aspect to your property, stack it where the sun will get to it.
As well as the sun, you will need airflow. Find the windiest spot and allow the air to circulate. Think of it like drying washing on a line. You need the heat from the sun and the breeze to make everything smell air-fresh.
The more sunlight and wind it is exposed to means it will dry faster. If you expect rain, make sure you have a cover so it won’t get wet. However, the trick is to allow the wood to breathe, so covering it with a tarp might be counterproductive, causing the moisture to become trapped.
The trick is to monitor the weather and when the rain stops, uncover the wood to let the sun and wind get at it.
Use a Fan or Dehumidifier
One of the best ways to speed up your wood drying process is to use a dehumidifier or fan. This only works inside, but if you are storing your wood in a garage, then it is really effective.
Place your fan or dehumidifier next to your wood stack and set it going. The dehumidifier sucks the moisture out of the wood and speeds the drying time from months to weeks. The fan keeps a constant airflow circulating around the stack, and while it doesn’t work as fast as the dehumidifier, it still speeds the process.
The only thing to remember is that it will cost you more in energy usage running a dehumidifier continuously for a couple of weeks. The other thing to bear in mind is you need to schedule regular trips to empty the water reservoir in the dehumidifier.
And you will be surprised just how quickly that water tank collects moisture.
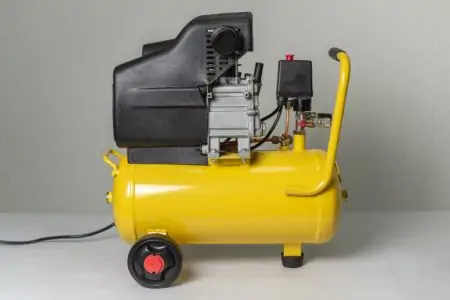
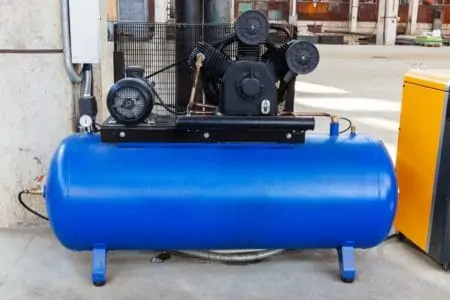
Kiln Dry
For this method, you will need a wood kiln. Now, this isn’t something everyone has access to, so this tip will only work for some of you. But, if you have access to a wood kiln, you will love this technique for drying wood.
Imagine getting dry wood in a matter of hours rather than weeks or months. Kiln drying wood is regulated by heat and humidity, with some even controlling the steam levels. Suppose you don’t have a wood drying kiln. Hop onto Google and search your local area. There is likely to be a kiln within driving distance that might let you dry your wood.
The only downside to this approach is you are restricted to the amount of wood you can dry, and there is the cost if you are using a third-party kiln. Just bear in mind that using a kiln might restrict the size of the strips of wood you can dry.
Use a Microwave
No, it’s not a joke. You can actually dry wood pieces in your microwave to remove the moisture. You can buy industrial-size microwaves that dry wood in no time at all, but they are still restricted to the sizes of the pieces of wood.
If you only want to dry small strips, save yourself the bother of investing in a commercial microwave and use a standard model.
Rapidly extracting moisture has its advantages and disadvantages. The wood dries quickly, but unless you know how to do it, you run the risk of scorching the wood to the core, destroying it completely.
For the ideal time settings, you should microwave the wood for roughly 2 minutes for every 1.5-inch thickness. Also, keep your moisture meter handy, so you can make regular checks on the moisture content to ensure it doesn’t over-dry.
If you use your microwave to remove moisture, you will be restricted to smaller pieces, so you might not get all your wood dry. The significant plus side is you get your wood dried 10 times faster than using a kiln.
Don’t Delay
If you have a fallen tree or wood in the yard that you want to process, don’t delay. The sooner you get it done, the better the outcome for drying it out because it opens up the wood. It also prevents staining and mold and mildew growth, which could ruin the grain pattern.
Removing the bark can help to extract the moisture. Bark acts as a barrier, trapping in the water and allowing the wood to rot from the inside.
You can always tell when the wood has been incorrectly stored when you spot spalted or partially rotted wood.
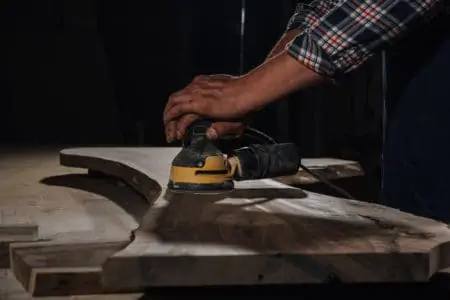
Cut the Wood Oversized
As the wood dries, it shrinks, so rather than measuring it so it fits your design, and then cutting and drying, cut it oversized.
That way, you won’t end up with lengths too short for your project because they have shrunk in the drying process. It also means you have more to play with when it comes to sanding and cutting angles and edges.
Don’t angle the wood by cutting beveled edges, and then let it dry because it will warp, throwing the edges out and making them uneven.
Seal the Ends
Moisture releases from logs through the cut ends at a rate 10 to 12 times faster than at any other point in the log. By sealing the ends, you slow the process, controlling moisture release. By regulating the drying time, you reduce the chances of cracking and shrinkage, called checking.
You can use wax, paraffin, polyurethane, and even latex paint to prevent checking. It is the best practice to seal the ends within minutes rather than hours.