Brick is a much sturdier material than most types of wood, which can make it more intimidating to drill. This is something that most DIYers will need to do at some point, whether you are hanging up a picture or mirror, or fitting shelves or cabinets.
Drilling into brick is less difficult than it might seem, especially with the help of modern power tools. However, if you have never done it before, you might need some advice to do it safely and achieve the desired results.
If you want to know how to drill into brick, our step-by-step guide will walk you through the process. This includes choosing the right drill and bit, taking the necessary safety precautions, and drilling the hole itself.
Key Takeaways
- Use a hammer drill for brick: Hammer drills are designed for tough materials like brick, making them the ideal choice for drilling into it.
- Wear protective equipment: Protect your eyes, ears, and lungs with goggles, ear defenders, and an N95 respirator, as brick dust can be hazardous.
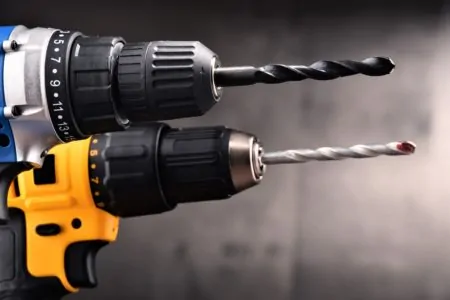
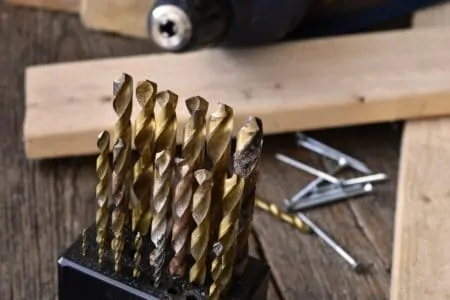
- Choose the right drill bits: High-Speed Steel (HSS) masonry drill bits are suitable for brick. Start with a small pilot hole and work up to the desired size.
- Drill carefully and clean the hole: Drill slowly and steadily to avoid cracking the brick, and use compressed air to remove debris from the hole before inserting anchors or screws.
Is It Better to Drill Into Brick or Mortar?
Whether you should drill into brick or mortar is a hotly debated topic. The answer generally depends on why you are drilling the hole and what you intend to hang or mount on the wall. Mortar is softer than brick, so it’s easier to drill. It is ideal for hanging lighter items like picture frames and paintings.
However, we don’t recommend mounting shelves or cabinets by drilling into mortar alone. Old mortar is prone to cracking and crumbling, so it might not have enough strength to hold heavier items. Even new mortar will probably struggle to take the weight of heavier objects.
The main advantage of drilling into mortar is that you won’t need a hammer drill. A standard rotary drill will have plenty of power to penetrate mortar.
Bricks are far more solid, so they will be able to hold heavier items. This isn’t always the case, as older or lower-quality bricks might be weaker and could crack when you drill into them. In these cases, it might be better to drill into the mortar to give your anchor a solid brick to expand against.
Another advantage of drilling into mortar is that it is easier to patch if you make a mistake. If you have exposed brickwork, it will be obvious where it was drilled even after repairing it.
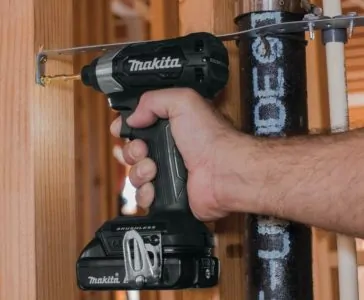
What Type of Drill to Use for Brick
For small holes, you might be able to get by with a rotary drill. However, the type of drill you need depends on the type of bricks you have. Older bricks are generally weaker and easier to drill through, but you might have dense, tougher bricks.
If your bricks are too hard for a rotary drill, you will need a tool that packs a punch. That is where a hammer drill will prove its worth.
Hammer drills are designed specifically for drilling through masonry and other tough materials. They use a hammering action, either alone or combined with rotation, to dig into materials that would be impossible to penetrate with a standard rotary drill.
This percussive drill bit movement is what makes the hammer drill such an effective hand tool. Once you have a drill that is suitable for the task, you will also need to find the right drill bit.
What You Need
If you want to drill into brick smoothly and safely, it is important to prepare all the necessary equipment. Before you start, this includes wearing the required Personal Protective Equipment:
- Protective goggles to shield your eyes against debris and particles while drilling
- Ear defenders to protect your hearing, as hammer drilling bricks is noisy
- N95 respirator to keep harmful brick dust particles out of your lungs
- Work gloves as sharp brick debris could be launched at your hands
Having protected yourself, here are the items you will need to complete the task:
- Tape measure and pencil
- Hammer drill
- Masking tape
- High-Speed Steel masonry drill bits (one small and one the desired hole size)
- A can of compressed air
- Wall anchors or anchor screws
- Dustpan and brush
- A vacuum cleaner with a pre-filter
- Mop (optional)
How to Drill into Brick
1. Make a Mark on the Wall
Measure where you want the hole or holes to go then use a pencil to mark the spot or spots. Before drilling, hold up the picture, shelf, cabinet, or whatever else you are hanging on the wall to ensure the marks are accurate.
Double Check
2. Set the Hole Depth
If your drill has a stop bar, set it to the depth you want the hole to be. If you don’t have one, you can wrap masking tape around your masonry drill bit to show you when you have reached the correct depth.
3. Safety First
Brick dust contains Crystalline Silica, a substance that is hazardous when inhaled. N95 respirators filter out about 95% of harmful pollutants, including Crystalline Silica, preventing damage to your lung tissue.
Drilling a hole might seem like a relatively small job but you should still protect yourself. Put on your goggles, gloves, ear defenders, and an N95 respirator. This won’t make your job take much longer and will ensure you can complete it safely.
If you are drilling above head height and need to use steps or a ladder, make sure you are on a flat, stable surface.
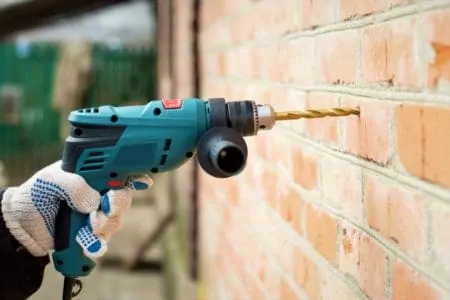
4. Drill the Pilot Hole
Insert the small pilot drill bit into the hammer drill, set the speed to slow, and hold the drill perpendicular to the wall. This is important because drilling at an angle affects the grip of the anchor and will make it more difficult to line up the screws when inserting them.
Don’t apply too much downward force to the drill bit at this point. You want the bit to turn slowly until it starts to bite into the surface of the material. When you feel resistance, press a little harder using steady force until the pilot drill reaches the desired depth.
Quick Note
5. Change to a Larger Drill Bit
Swap the smaller pilot bit for the HSS drill bit that matches the size of the hole you want. Use the same principles of holding the drill perpendicular to the wall and applying consistent pressure, then starting the drill bit slowly until it bites into the brick. Once you have reached the desired depth, withdraw the drill bit.
6. Clear the Debris from the Hole
Use a can of compressed air to blast any brick dust and other debris away from the hole. Keep your face away from the hole while doing this. Remove as much debris as possible as it could compromise the integrity of your wall anchors later.
7. Insert the Anchor
Insert the wall anchor, making sure it sits flush with the surface of the wall. Place the item you are hanging or mounting and insert the screws. Make sure they are tight but be careful not to overtighten them. Wall anchors are plastic and can be easily damaged if your screw goes too deep, which could lead to your item falling from the wall.
Anchor Screws
8. Clean the Work Area
Keep your goggles and N95 respirator on but you can remove the ear defenders. Sweep away the largest chunks of debris, then grab your vacuum cleaner to remove the remaining brick dust. If you have a solid floor, you can use a mop.
Once you have finished your work, take the can of compressed air outside and blast your shoes and clothes to remove any remaining debris. You should then wash your clothes properly and take a shower.
Yes To Overalls
FAQs

Why Do Bricks Take So Long to Drill?
Bricks are tough and dense materials that make drilling through them difficult. This is because bricks are often much harder than wood or metal and can be layered in such a way that makes it quite tough for the drill bit to penetrate all the way through them.
Drilling through brick requires a lot of persistence, as the bit can take several long passes to get the job done.
Furthermore, drilling too quickly can cause the bit to overheat and may even break it. Therefore, it is important to go slow and steady when tackling a hole in brickwork for best results.

How Do You Drill a Hole In Brick Without Cracking It?
Drilling a hole in brick without damaging it can be accomplished by following certain precautions.
Firstly, it is important to use the appropriate drill bit for the pilot hole. Ensure the pilot hole is slightly smaller than the intended diameter of the drilled hole by at least several millimeters.
Next, drill slowly and apply a steady pressure; this helps prevent the brick’s cracking, reduces vibration, and ensures an even distribution of material removal.
To further reduce potential cracking associated with drilling into brick, moisten or wet the surface before drilling; this creates a lubricant between the brick and drill bit, while also helping to cool both surfaces.
Following these steps ensures that your desired results are achieved without risking any damage to your brick.

Can I Use a Cordless Drill for Masonry?
If you need to do some light masonry work, a cordless drill is all that is required. Drilling into concrete with a rotary cordless drill may not be as efficient as a hammer drill, but it can certainly complete the task successfully.
It is perfect for small projects that require only a few holes to be drilled; everything from setting up hangings on walls and light fixtures to working on larger construction activities.
Whichever tool you choose, safety must remain your priority and the drill should always be used with the appropriate accessories.

Will a Wood Drill Bit Work on Brick?
Wood drill bits are a popular choice among DIYers and professionals, however, they cannot be used on brick due to their design. Generally, wood drill bits are made of softer metals than what is required for drilling into harder materials such as brick.
Although the overall shape of the bit may appear similar to masonry drill bits, the metal composition of the bit is not strong enough to withstand the strenuous activity associated with drilling into brick or concrete.
Additionally, masonry drill bits require more bracing and torque in order to safely penetrate brick. Wood drill bits are simply not designed for such intense tasks.

What Is the Best Drill for Brick Walls?
For a reliable and successful drilling experience into brick walls, the BLACK+DECKER DR670 Hammer Drill is a trustworthy choice.
This drill is equipped with variable speed trigger, allowing you to easily adjust the drilling speed according to your preference. It also has an ergonomic grip handle for maximum comfort even after hours of use, reducing any hand fatigue.
It also boasts a keyless metal chuck that ensures quick bit changes so you can finish the job quickly and efficiently. These attributes combined make this drill the best choice for tackling brick walls.