Cutting ceiling tiles is simple with the right tools. Luckily, you can cut most ceiling tiles with the tools you have lying around the home. However, knowing which tools are best for which tile is another thing.
We show you how to cut ceiling tiles using the correct tools and maintain them to keep them looking good.
Key Takeaways
- Determine the type of ceiling tile material, such as wood, fiberglass, or mineral fiber.
- Use appropriate tools like a utility knife, drywall saw, or tin snips for cutting tiles.
- Measure and mark the tiles accurately, considering shadow lines and bevel edges for a neat finish.
- Regularly maintain ceiling tiles by vacuuming, cleaning with lint-free cloths, and inspecting the grid.
What Is the Best Tool to Cut Ceiling Tiles?
Choosing the best tool to cut ceiling tiles depends on the tile material. To discover what your tile is made from, remove one from the grid and give it a tap.
If it makes a hollow sound, it is made from wood. Fiberglass and mineral fiber have a rougher feel and are lighter.
For lightweight acoustic fiber panels, a carpet knife works well. Suspended ceiling tiles cut better with a utility knife or drywall saw.
Tin snips work well with tin tiles, while a carpenter’s T or framing square is a great choice for scoring your tiles. If you have plastic tiles, a non-melt blade is the best option, and if your tiles are wooden, think about using a table saw to make the cuts.
How to Cut Drop Ceiling Tiles
You can use a utility knife to cut non-acoustic drop ceiling tiles. You can also use a rotary cutting tool to make circular or irregular cuts.
Before we get into the details of how to cut drop ceiling tiles and other tile types, we need to take stock of the tools and materials you need.
What You’ll Need
- Tape measure.
- Pencil.
- Gloves.
- T-square or framing square.
- Compass.
- Rotary cutting tool.
- Utility knife.
- Drywall saw.
- Step ladder.
- New tiles.
1. Wait Overnight
New tiles take time to adjust to the room’s temperature and humidity. This causes the tile to expand or shrink by the slightest margins. Remove the packaging and place them in a stack overnight to acclimatize.
2. Measure the Tile
Lay the tile face-up on a flat surface and make the required marks with the pencil and measuring tape. Do this at the top and bottom edge of the tile.
3. Score Along the Line
Line it up with the pencil line using the framing square or T-square. Grab the utility knife and score along the edge of the T-square.
4. Make the Cut
Cutting a drop tile is similar to cutting drywall, so if you’ve ever cut drywall, you’ll get this technique straight away.
Slide the tile so that the scored section overhangs the edge of your flat surface. Press down on the part of the tile to be discarded until it snaps. Flip the tile over and cut the paper backing with a utility knife.
Now, clean up the cut edge with the utility knife.
5. Making the Shadow Cuts
The shadow line is a grooved edge that lets your tile sit snugly in the ceiling grid. Mark the line with a pencil once the tile is in place. You will need a step ladder for this. Now, remove the tile and place it on a flat surface.
Sink your utility knife in about halfway and start scoring around the pencil line. You will need a rotary cutting tool for wooden tiles.
Once you’ve covered the entire shadow line, insert the utility knife into the side of the tile, about halfway in-depth, and start cutting. This creates a recessed edge to allow the tile to sit flush in the ceiling grid. If you want a neater finish, you should consider cutting a beveled edge.
Now you are ready to pop the tile back in place.
Remember
You can adjust the depth to increase the tegular (reveal edge) to make the tile protrude deeper in the grid for a fuller effect.
6. Making Circular Cuts
Okay, so cutting straight lines is simple enough, but how do you tackle circular shapes like around pipes and for lights?
Using the pencil and compass, draw a circle on the tile’s surface. Push the drywall saw into the tile and start cutting around the line. Keep going until you arrive back at the start point.
Push out the inner tile circle.
Top Tip
You can use the rotary cutting device if you have a lot of irregular shapes to cut because it speeds up the process.
How to Cut Acoustic Ceiling Tiles
You can use a utility or carpet knife for cutting acoustic ceiling tiles, but a carpet knife makes deeper and cleaner cuts. Always wear thin protective gloves to keep your hands safe from rough tile fibers.
What You’ll Need
- Scrap plywood.
- Tape measure.
- Pencil.
- Protective gloves.
- T-square or framing square.
- Utility knife.
- Carpet knife.
- New tiles.
- Rotary cutting tool.
- Power drill.
- Step ladder.
- Hole saw.
1. Mark the Line
To measure the tile, work from the inside lip of the grid (metal frame) rather than the outer edge. Otherwise, your tile will be too small. Use the tape measure and pencil to record the dimensions.
Place the tile face-up on top of the scrap piece of plywood. It protects the work surface beneath when you make deep cuts.
Top Tip
To score an accurate line, measure out the dimensions and press the hook of the tape measure into the tile. Lock the measurer in place and drag it along the tile.
2. Making the Cut
Put on your protective gloves and place the framing square or T-square onto the marked pencil line. Press down on the square with your free hand while you make a pass along the line with the carpet knife.
Make another pass and check that the blade has penetrated through the tile. If not, make a third pass with the knife.
Take Note
While thin gloves are advised, surgical gloves are too fragile and prone to tearing.
3. Making Circular Cuts
You can use the carpet knife to make holes for speakers. First, decide where to make the cut and mark the center point with the pencil. Use the compass and draw a circle at the desired size.
Press the knife into the marked pencil line and start cutting along the perimeter of the circle. Now, push out the inner section and tidy up any rough edges with the utility knife.
Keep In Mind
Don’t forget to cut the shadow line as per the method listed in the previous section. This allows the tile to sit flush in the ceiling grid.
4. Making a Circular Cut With a Rotary Tool
Using a rotary tool can be quicker and more accurate. If you have a lot of acoustic tiles to cut with many irregular shapes, it is the best tool to use.
Attach the multipurpose cutting tool with a circle guide to give you better accuracy. Align the cutting point by tilting the blade slightly, and set the circle guide to the desired dimensions.
Switch on the tool and press the cutting tip into the tile, pivoting as you cut.
5. Making Circular Cuts With a Hole Saw
Using a hole saw makes light work of cutting through acoustic tiles, especially when making holes for light fittings.
Select the right size hole saw and insert it into your power drill. Find the center of your hole and mark it with a pencil. Place the tip of the hole saw onto the center mark and begin drilling.
Apply gentle, but firm pressure as the hole saw eats into the tile. When you break through the other side, release the drill trigger and unplug it from the wall.
How to Cut Tin Ceiling Tiles
Tins ceiling tiles are easy to cut with long snips, like these TOOLEAGUE Aviation Tin Snips, but standard tin snips are just as useful.
Take Note
Cutting tin is dangerous because of the sharp and exposed edges, so wearing thicker gloves is recommended.
What You’ll Need
- Tin snips.
- New tiles.
- Tape measure.
- Marker.
- Compass and pencil.
- Power drill.
- 0.375-inch drill bit.
- Gloves.
- T-square or frame square.
1. Mark the Cut
Put on your gloves and place the tile face down on a flat surface. Measure the tile, marking the dimensions using a permanent marker. Use a frame square or T-square to draw the line accurately with the marker pen.
2. Cut the Tile
Cut along the marked line, avoiding sharp or jagged edges. Gently bend the metal with your free hand as you work. It ensures that the tin snips cut in a straight line.
3. Cutting Circles
Find the center of the circle and mark it using a pencil. Grab the compass and draw the circle. Draw around the pencil line using a marker pen to give you better visibility. Insert the 0.375-inch drill bit into the drill and fire it up.
Begin by drilling a starter hole on the line, which gives you a start point for the tin snips.
How to Cut Ceiling Tiles for Speakers
Recessed speakers in your ceiling look stylish, but you need to cut around the speaker rather than tiling over them. The most common location for ceiling speakers is in the four corners of the room for better acoustics.
Using the tape measure, find the diameter of the speaker. Place your ceiling tile on a flat surface and transfer the diameter measurement to the tile using the pencil and tape measure. Find the center point.
For example, if your speaker diameter is 10 inches, the center point is five inches.
Use the compass and pencil to draw accurate circles. You can cut holes in the tiles using the rotary cutting tool or a carpet knife.
Once done, place the tile on the ceiling to see if it fits around the speaker. If it does, job done. If not, you will need to make minor adjustments using the carpet knife or a utility knife.
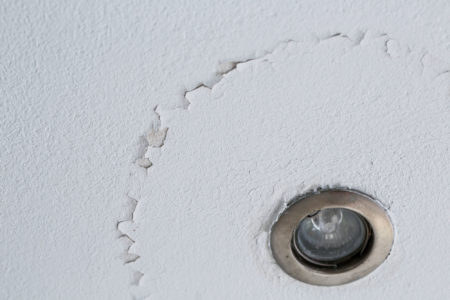
Maintaining Ceiling Tiles
Everything needs maintenance, and ceiling tiles are no exception. So, how do you keep them looking good when they are up? We share some hints and tips for an easier life.
Vacuum Regularly
It’s not just your floor that needs regular vacuuming. Your ceiling tiles gather dust and cobwebs and need the same love and care. Attach the hose to your vacuum and run it across the ceiling tiles.
It improves the look of the tile and stops dust from falling, which contaminates the air in the room.
Clean With Lint-Free Cloths
To remove stains and dirt, wet a lint-free cloth and wipe your tiles down regularly. Using a step ladder to remove all the tiles might be better. That way, you can get them cleaned in one hit.
Inspect the Grid
While focusing on your ceiling tiles, you should also maintain the ceiling grid. Make sure that it is square and the tiles sit evenly. Also, removing dirt buildup helps the tiles to sit flush and not look misaligned.
FAQs

How Do You Cut Decorative Ceiling Tiles?
Decorative ceiling tiles are cut the same way as other tiles, except you need to work with the pattern. Making cuts in the wrong place can ruin the entire look of the ceiling.

How Do You Fix Sagging Ceiling Tiles?
The easiest way to mend a sagging ceiling tile is to grab a staple gun and 0.5-inch staples. Push the tiles up, so they touch the ceiling and fire in a series of fasteners at each point where the tile sags.

Can You Paint Ceiling Tiles?
You can paint ceiling tiles if they become too dirty or stained. Most ceiling tiles are paintable; however, check before applying the paint. It’s probably not advisable to paint drop ceiling tiles and replace them when they become stained.

What Are Drop Ceiling Tiles Made From?
Drop ceiling tiles are typically vinyl, fiberglass, and expanded polystyrene. You can also buy mirrored and tin ceiling tiles.

What Is The Standard Size Of Ceiling Tile?
Ceiling tiles usually come in two standard sizes: 600mm x 600mm (23.6 inches by 23.6 inches) and 1200mm x 600mm (47.24 inches by 23.6 inches).

Is Ceiling Tile Dust Bad For You?
All dust is harmful, including ceiling dust. It contains pollutants that aggravate lung conditions and irritate your eyes and throat.
On the Tiles
Cutting ceiling tiles to the correct size is crucial if you want them to fit. You also want them to look their best, so think about shadow lines and bevel edges for the neatest finish.
Cutting the tiles is relatively straightforward, and if you have a ceiling grid, inserting the tiles is easy. Don’t put up with cracked, stained, and missing ceiling tiles a moment longer. Roll up your sleeves and get stuck in.