Water coolers provide convenient, refreshing cold water in your home or office whenever you need it. However, they can also become a breeding ground for bacteria if they aren’t properly cleaned and maintained.
Like any appliance that deals with food or drink, it is important that you clean your water cooler thoroughly. Thankfully, this isn’t overly complicated and you will be able to do it without any harsh chemical cleaners.
To help you keep your water cooler as hygienic as possible, this guide will explain some of the most common issues that affect coolers. We will then walk you through how to clean a water cooler so you can continue to enjoy refreshing drinks throughout the day.
Key Takeaways
- Clean water coolers every six weeks to prevent bacteria buildup.
- Use vinegar or unscented bleach as cleaning solutions.
- Top-loading and bottom-loading dispensers require different cleaning methods.
- Flush the tank thoroughly after cleaning to remove any lingering taste or smell.
Why It is Important to Clean Your Water Cooler
Water coolers store and dispense cold water in your home, gym, or workplace. Although the water that enters the cooler is clean, germs and microorganisms can grow inside the unit and its dispenser. This is due to providing a moist environment where most bacteria will thrive.
To ensure you continue to drink uncontaminated water, you should clean your cooler every six weeks. You can also clean your dispenser whenever you replace the bottle to make it part of your usual routine.
Cleaning a water cooler doesn’t require any special products or tools. All you need is vinegar or bleach, water, and a little time.
If you choose to use bleach, use an unscented product. Any added fragrance in your cleaner could be left in the unit and alter the taste and smell of your water.
Vinegar and bleach are both effective at removing most bacteria, mold, and mildew that might be present in your water cooler (1).
Common Water Dispenser Contaminants
Harmful bacteria that can grow in cold water dispensers include Ralstonia spp and Pseudomonas aeruginosa. Ralstonia spp can cause urinary tract infections (2), and Pseudomonas aeruginosa can cause infections in people with compromised immune systems (3).
Studies have found several other contaminants in water coolers, including fecal coliform and streptococci (4). This data showed that there were more contaminants in an unclean water cooler than in standard tap water. Experts recommend that cleaning the dispenser every two months will keep the contaminants in the water at a minimum (5).
How to Clean a Water Cooler
Cleaning a water cooler is easy if you have the time and the necessary tools. Here’s how to make an effective cleaning solution:
- Vinegar: Add 1 quart of white vinegar to a bucket with 3 quarts of warm water. Mix it well before use. You can add one or two tablespoons of lemon juice if you don’t like the strong vinegar smell.
- Bleach: Mix 1 tablespoon of chlorine bleach with 1 gallon of water to create a mild solution. Be careful when mixing so you don’t spill it. We recommend wearing old or protective clothing, just in case you get some bleach on it.
Warning
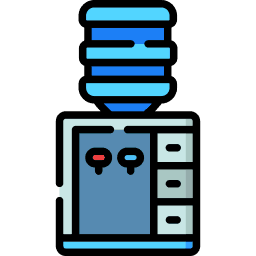
Top-Loading vs. Bottom-Loading Water Dispensers
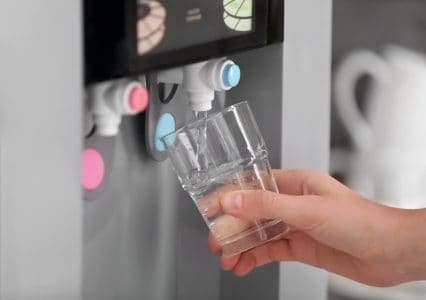
Top-loading and bottom-loading water dispensers are both effective at delivering quick, convenient water but how to clean a water cooler will vary depending on which type you have.
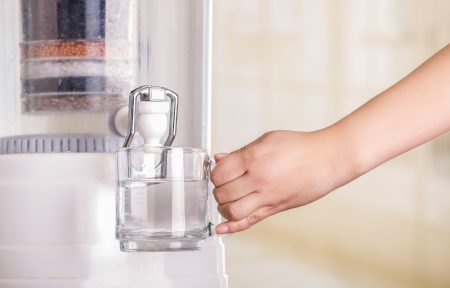
Top-loading machines rely on gravity to do most of the work for them. These units have the bottle on top with a valve at the bottom that seals it when not in use. When you open the spigot, the valve opens and gravity forces the water out.
A bottom-loading water cooler is more complicated. These are sleeker modern machines that don’t have the recognizable water container visible at the top.
As they need to draw water up from a tank, they are equipped with electric pumps. This keeps the reservoir filled so you always have cool water at the ready. An extra water line acts as a sensor and detects when the tank needs to be refilled.
How to Clean a Top-Loading Water Machine
The best time to clean a top-loading water dispenser is when the bottle is empty and needs to be replaced. Follow these steps to disinfect your cooler using vinegar or bleach:
1. Unplug the Water Cooler
It is essential that you unplug your water cooler before cleaning it as you are dealing with water and electricity. Unplugging the unit will also give you more freedom to move around the cooler without the risk of tripping.
2. Remove Water Bottle
Remove the water bottle as you normally would. Inspect the area where the bottle meets the dispenser for any signs of mildew or mold. Soak a clean sponge in your cleaning solution and use it to wipe the area thoroughly.
Allow the solution to work for two to five minutes, but avoid leaving it for any longer as it could damage the surface of the dispenser. If you encounter any stubborn stains, you can make a paste by mixing water and baking soda. Use a small, stiff brush to scrub the stains away.
3. Clean the Water Guard
The water guard is the part that punctures the bottle’s seal when you insert it. If your dispenser has a water guard, remove it. Rinse it under a warm tap and then wipe it using your cleaning solution. Rinse it again to remove any leftover cleaner and allow it to dry.
4. Remove the Drip Guard
The drip guard is the tray that holds the cup and it will also need to be cleaned. Remove it and rinse it under a tap, then clean it thoroughly using your cleaning solution.
If you find any mildew, mold, or tough stains, you can use a baking soda paste here as well. Once you have cleaned the drip guard, rinse it thoroughly and allow it to dry.
5. Clean the Tank
Use your remaining cleaning solution to clean the inside of the tank. Close the spigot and pour the solution into the top. Leave it to work for two to three minutes before opening the spigot, or taps, to drain the tank.
If you have two taps, alternate between them to ensure they are both thoroughly cleaned and disinfected.
6. Rinse the Tank
To remove any contaminants or bacteria, you need to rinse the tank thoroughly using clean water. Close the spigots again and fill the tank with water, then drain it completely.
Repeat this two to four times, then taste the water if you’re using vinegar, or smell it if you’re using bleach. If you suspect there is still some disinfectant present, fill the tank with clean water again and drain it. Repeat the process until all signs of the cleaning solution are gone.
7. Replace the Tray and Water Guard
When you are happy with the water quality, put every piece you removed back into their positions. Dry the dispenser using a clean cloth before you install the new water bottle.
Stay Clean
Remove the cap and place the bottle into the dispenser. Make sure it fits snugly and you see air bubbles floating to the top of the bottle. The bubbles indicate that the bottle has been sealed to the machine.
If your bottle doesn’t have a non-spill cap, you can use plastic wrapping to prevent leaks. Simply remove the cap and tightly wrap one or two layers of plastic around the top. Puncture a small hole to help relieve the pressure.
8. Plug In
Once the dispenser is clean and the new water bottle is installed, it’s time to plug it back into the outlet. Allow the unit to cool the water for 30 to 60 minutes before you drink from it. Test both of the dispenser’s taps to ensure everything is working as it should.
How to Clean a Bottom-Loading Water Dispenser
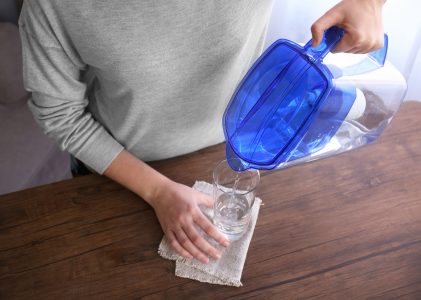
If you need to clean a bottom-loading water dispenser, you can use the same cleaning solution as a top-loading unit. You will also need a funnel and an empty bottle to get started.
1. Unplug the Cooler
Unplugging your dispenser is critical, especially as bottom-loading models have more electronic components. Water dispensers are usually placed in corners or against a wall, so unplugging them will allow easier access.
2. Save the Bottle
After removing the water bottle, set it aside instead of disposing of it — you will need it for the cleaning solution. Drain any water that may be left in the reservoir by opening the taps.
Add your chosen disinfectant to the empty bottle using the funnel. Check the capacity of the water bottle as this will determine how much bleach or vinegar you need to add.
Mix one part of vinegar for every three parts of water. If you want to add lemon juice, do it after you have thoroughly mixed the vinegar and water.
If you are using bleach, add one tablespoon to every gallon of water. Mix the solution thoroughly.
3. Install the Water Bottle
Install the water bottle containing the solution as you normally would, then allow the tank to fill. Leave it for up to 10 minutes to effectively disinfect the tank.
After 10 minutes, open the taps to release the solution until the bottle is completely empty. The drained solution should be discarded down a drain or a toilet.
You should also remove the drain tray where you place the cup. It should be emptied, rinsed, and wiped using your cleaning solution.
4. Refill the Bottle
Fill the empty bottle with clean water and use it to rinse the tank. Allow the tank to fill with fresh water and then drain it through the taps.
Repeat the process and check the water coming from the spigots for any signs of bleach or vinegar. If you notice the smell of cleaner, keep flushing the tank with clean water until you can’t smell it anymore.
5. Plug In
Put the drain tray back into place and replace any other parts you removed. Wipe off the new water bottle using a clean, dry cloth, then install it as you normally would.
Plug in the dispenser and give it at least 30 minutes to cool the water.
FAQs

Is It Safe If There’s Black Mold in a Water Cooler Drain?
Mold, especially black mold, is hazardous when indoors. It is a wet type of fungus that appears dark green or black. Black mold can cause several health problems, such as difficulty breathing, severe nausea, nose bleeds, and more (6).
If you see any signs of mold or mildew in your water dispenser, avoid using it. Clean the machine thoroughly by following the steps above. Use unscented bleach as it is a more powerful disinfectant than vinegar.
After cleaning the cooler, check the water for any signs of mold or other contaminants before drinking it.

Will the Water Taste Better After Cleaning?
The goal of cleaning the dispenser is to remove any build-up of bacteria or grime. These issues can negatively affect the crisp taste you expect from bottled water that has been chilled. After cleaning your unit, the water it dispenses should taste fresh again.

How Can I Remove a Vinegar Taste?
Before cleaning your water cooler, you need to decide which disinfectant to use. If you choose to use vinegar but want to avoid its strong smell, you can add lemon juice.
To prevent a vinegar taste in your water, flush the tank thoroughly after cleaning it — you might need to repeat the process several times to completely remove the taste and smell. Remember to drain the clean water through both spigots to ensure both lines are clear.
If the issue persists, your cooler might require more extensive maintenance or even replacement.

Are Water Dispensers Safe?
It is understandable that you might be concerned about whether or not water dispensers are safe, as you should be with any appliance that comes into contact with food or drink. However, as long as you keep your cooler clean and free from bacteria and grime, it should be perfectly safe.
Water dispensers are an excellent option if you live in an area with a low-quality water supply. Rather than having to treat your water with an expensive filtration system, which might still be ineffective, you can have a ready supply of safe, bottled water whenever you need it.
What Should I Do If My Water Dispenser Is Leaking?
If your water dispenser is leaking, you should immediately turn it off and unplug it. Next, you should remove the bottle and drain the reservoir completely.
We recommend leaving any extensive maintenance to a professional. Leaks are generally not easy to fix and you risk breaking the machine and invalidating its warranty if you don’t know what you’re doing.

How Often Should a Water Cooler Be Cleaned?
Many experts recommend doing so every 6 to 12 months, depending on how often the water cooler is used. To start, you should prepare a clean solution consisting of warm water and a few drops of dish soap or glass cleaner.
Wipe down all surfaces with a clean towel or cloth, then let the unit air dry for several hours. Once the unit has dried completely, you can apply disinfectant according to the manufacturer’s instructions.
This will help remove any lingering residue and ensure your water cooler is free from harmful microbes and other contaminants.

How Long Can Water Sit in a Water Cooler?
The 30-day rule is typically considered a good one to follow It indicates the average length of time that water can remain uncontaminated inside a closed water cooler. But, of course, that will vary depending on the condition you’re keeping it in.

Why Does My Cooler Smell Like Fish?
There are several reasons your water cooler might smell a bit fishy. One possibility is that bacteria may have grown on the surface of the water container, especially if it has not been properly cleaned and sanitized according to the manufacturer’s instructions.
Another potential cause could be mold or mildew growing in the coils at the back of the unit or in other inner parts that are difficult for you to access.
Other factors, such as changes in temperature or humidity levels, can also contribute to bad odors in your cooler. To determine what is causing the smell and eliminate it from your unit once and for all, you may need to consult a professional specializing in water coolers.

Is Algae in Water Cooler Harmful?
Algae in water coolers can be harmful to our health if they are allowed to grow unchecked. Legionella, one alga that commonly grows in these systems, is associated with serious respiratory infections like Legionnaires’ disease.
To prevent this type of algae from forming, it is important to regularly monitor your water cooler and take action to clean or replace contaminated parts as needed.
This might involve carefully flushing out the system, using a disinfectant solution, or replacing any noticeably dirty or damaged components.

How Do Self-Cleaning Water Dispensers Work?
Self-cleaning water dispensers use one of two possible methods for cleaning themselves: ozone decontamination or how water cleaning technology.
Ozone is a gas that is utilized as an extremely effective disinfectant. Depending on the model, this system’s processing time range is between 15 and 90 minutes.
The dispenser’s built-in ozone self-cleaning technology sanitizes and cleanses the device, preventing potentially hazardous bacteria and germs buildup for your safety.
The second method uses the tried-and-true method of cleaning: using hot water. This hot water is distributed throughout the rest of the water dispenser using a solenoid, which is under the control of a microprocessor.
During this procedure stage, the computer will shut down the refrigeration system to disinfect. The water cooler brings the temperature up just below the boiling point, which operates automatically.
It maintains that temperature for an extended period, which ensures that any bacteria or viruses present will perish. The hot water, like ozone, spreads throughout the water cooler, making its way into every nook and crevice accessible to water.
Following this procedure, the solenoid valve will be closed, and your water dispenser will return to its previous state.

How Do You Clean a Water Cooler with Baking Soda?
You can use water and baking soda to clean just about anything, including a water cooler. Use a ratio of around 1 cup to 2 tablespoons of baking soda.
After you’ve poured it into the cooler, scrub it with a clean cloth. Then empty what you can through the spigots, and run it under the running water a few times until the residue is gone.