Everyone should get to grips with the basics of toilet maintenance. After all, if it breaks, you are stuck unless you have the means to call in a plumber. Spotting signs of faults early could save you a pile of cash and means you get the repair done sooner rather than later.
Knowing how to adjust the toilet bowl water levels is one task that could save you from flooding the bathroom floor, causing more expensive damage.
Key Takeaways
- Adjust toilet bowl water levels to prevent flooding and damage.
- High water levels may indicate a blockage or issues with the toilet tank mechanisms.
- Low water levels can also signal a blockage or the need for adjustments in the toilet tank.
- Check for leaks, hairline cracks, and blocked air vents to diagnose and fix issues.
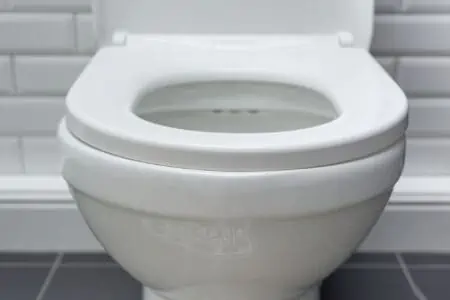
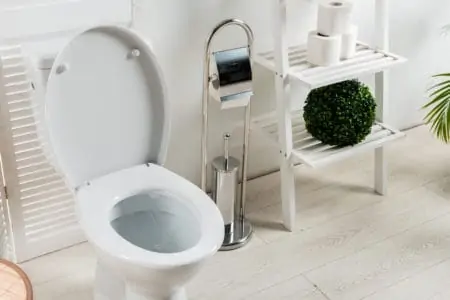
How Much Water Should Be In the Toilet Bowl?
The water level in the bowl should be just above the s-bend pipe that attaches to the waste pipe and regulates the water levels. If the bowl is too empty, you risk smells coming back through the pipework and entering the home. Too high, and when you flush, you risk flooding the bathroom.
Toilet Bowl Water Level Too High
When the water level is too high, it could be an indication you have a blockage. It could also mean the top of your waste stack is blocked because a lack of circulating air promotes slower drainage and refills.
The imbalance in the water levels could further accelerate the problem because it affects how the toilet flushes, which then determines how successful your toilet is at flushing away waste material.
It could also be an issue with the toilet tank. Flappers fail and allow water to seep into the bowl. Check that the ball valve is adjusted correctly and the chain attached to the flushing handle and flapper is the correct size.
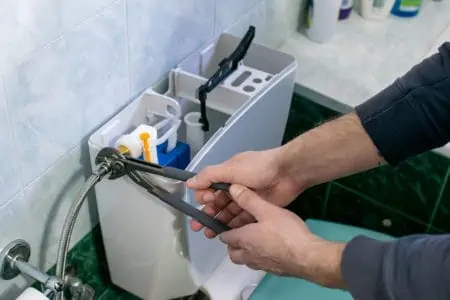
Measure the Chain
1. Lift the Lid
Carefully lift the tank lid and place it to one side. The great news is you don’t have to drain the water to perform this repair.
2. Is the Chain Slack?
If there is a lot of loose chain between the lever and the flapper, it needs to be adjusted. If the chain is slack, you may need to remove some links. These remove easily enough.
3. Remove Chain Links
The links unclip fairly easily. Once you have measured the length of the chain and how many links you need to remove, start unclipping the links. Always leave a tiny amount of slack to allow for wear and tear and knots in the chain.
4. Reattach the Chain
Use a paperclip with a waterproof coating and bend it into a circle with an opening. Slide it through the hole in the flush arm and slide the link of the chain through the gap. Now squeeze the paperclip shut, sealing it tightly.
5. Test and Adjust Where Necessary
Flush the toilet and watch carefully as the flapper opens and closes, keeping an eye on the chain. If the flapper opens and closes smoothly, the chain is correctly sized.
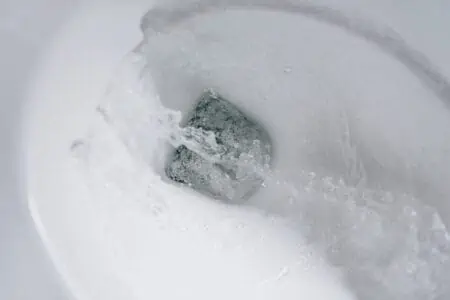
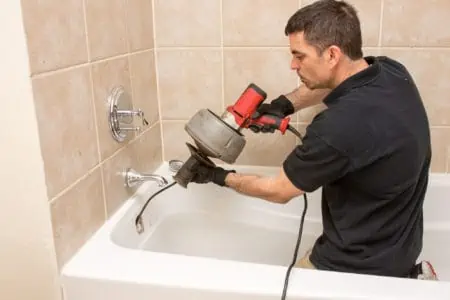
Clearing Blockages
1. Grab a Plunger
When your toilet blocks, the water has no means of escape and so sits in the toilet bowl. The last thing you should do is flush the toilet multiple times. This causes the water to overspill and flood your bathroom floor.
2. Insert the Flange Plunger
There are 2 types of plunger most commonly used: the cup and the flange. Cup plungers are better for clearing blockages on flat surfaces, so they would be the plunger of choice for your sink.
The flange plunger has a second rim that slots neatly into the drain hole of your toilet, creating an air-tight seal.
3. Plunge
Most blockages clear with 2 or 3 sharp thrusts of the plunger. What it does is channel the water and push it towards the jam as a high-pressure water jet. You know when the blockage clears because the water will suddenly drain away.
Replacing the Flapper
1. Turn Off the Water
Isolate the water to the toilet tank by twisting the isolation tap fully clockwise until it can move no further. You will find the tap at the rear of the toilet attached to the copper pipe that feeds the filler tube.
Now drain the tank by flushing the chain. Watch how the flapper behaves when the water drains. It will tell you if the flapper is faulty or the seals are bad. It might be a combination of both.
2. Remove the Old Flapper
The flapper will be attached in 2 ways: the chain attached to the flush lever and 2 plastic pegs that connect to the filler valve. Unhook the chain first and then ease the edges of the flapper, so they come free from the pegs.
When you remove the flapper, do it gently because the rubber goes brittle over time and could crumble in your hands.
3. Fit the New Flapper
When you go to the DIY store, take the old flapper with you to get the best match. Most look the same and attach in the same way, so swapping like for like should be a breeze.
First, clip in the sides of the flapper to the pegs, and then attach the chain to the lever arm, making sure that the chain is not too slack that it can’t operate the flapper. Make sure the edges of the flapper make a watertight seal.
You might need to use some fine-grade sandpaper to remove grime from the seal around the hole.
4. Turn On the Water
Twist the isolation tap so the water refills the toilet tank. Now flush the toilet, taking care to note how the flapper behaves. If there is no running water after the flush cycle has been completed, the repair was successful.
Install a New Fill Valve
1. Turn Off the Water
As before, isolate the water by turning it off at the isolation tap at the rear of the toilet. Now flush and allow the water to drain. The tank needs to be completely empty, so grab a cloth and soak up the residue at the bottom until it is dry.
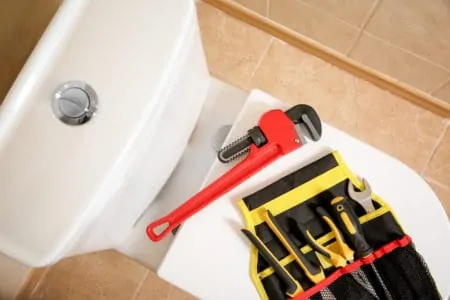
2. Detach the Valve
Unscrew the nut on the outside of the toilet, where the water pipe meets the base of the tank. You may need a wrench to do this and a pair of pliers to hold the fill valve in place while you twist.
3. Remove the Locking Nut
The filler valve is held in place by a plastic nut that threads onto the tank to lock it in place. It should unscrew by hand, but you may need a wrench. Don’t let the filler valve rotate while you do this.
4. Swap the Filler Valve
Lift the filler valve out and lay it to one side. Grab the new one and slot it into the hole and tighten the locking nut. Before doing anything else, ensure that there is no movement or wobble in the valve.
5. Reattach the Water Pipe
Attach the water pipe and screw it by hand until it is tight. Grab a wrench and give it a couple of turns to seal it against water leakage. You can use a plumber’s sealant or putty to get an extra secure connection.
6. Turn On the Water
Twist the isolation tap so the water starts to fill the water tank. Check for drips and wet patches. When the tank is full, pull the chain and allow the toilet to go through its flush cycle.
Listen for any running water, and check that the toilet tank refills correctly. If you are happy, replace the lid and grab a coffee.
Toilet Bowl Water Levels Too Low
In much the same way as having water levels too high, low water could also be an indicator of a blockage. Often, water cannot get back into the bowl if the pipes are clogged. The other usual suspect is the toilet tank mechanisms needing adjustments.
It could be something as simple as a ball valve or filler valve adjustment. The other more drastic cause is a crack in the toilet that allows the water to leak away. This is unlikely because toilets are robust and rarely crack.
Other than following some of the tips above, here are some specific things you can do when the toilet bowl water levels are too low.
Check for Leaks
1. Keep the Water On
This is one of the rare times when you want to keep the water on to locate the leak.
2. Check the Pipes
Feel where the pipes join the toilet tank to the toilet bowl. If you have a 1-piece toilet, you can skip to the next phase. Gaskets and seals wear over time to reveal small leaks. If you can feel water, you may need to tighten the bolts or replace the seals.
3. Check the Water Supply
Check that all the joints are secure where the pipe enters the toilet and there are no drips. If there are, you need to drain the system and reseal the joint using silicone or plumber’s putty.
Check the water supply valve at the wall and make sure that when you tighten it, you don’t overdo it and break the threads.
4. Check for Hairline Cracks
Feel behind the toilet, making sure that you run your hands over the entire surface. Hairline cracks are hard to spot, but if you feel a change in the smooth surface of the toilet or feel wet patches, you might need to consider replacing it.
You can patch the repair, but eventually, it will come back to haunt you, so it’s better to bite the bullet and swap the toilet.
Blocked Air Vent
1. Listen for the Sounds
If you can hear gurgling after the toilet flushes and smell bad odors, you might have a blocked vent. Another sign is the water doesn’t refill quickly. The vent equalizes the air pressure in your system by allowing fresh air to flow down the stack.
2. Get On the Roof
This repair is not for the faint-hearted as it involves climbing onto your roof to clear the blockage. If you are not comfortable with heights, call in the professionals.
3. Flush the Toilet
Have somebody stationed in the toilet, ready to flush. Place your hand over the vent as the toilet flushes, and if you don’t feel any suction, you have a blockage in the pipe.
4. Grab the Garden Hose
The easiest way to clear the blockage is to use the garden hose. Squirt the water down the stack on a high-pressure setting. Then get your assistant to flush the toilet again. Place your hand over the vent again, and if you feel suction, the blockage is cleared.