All showers drip for a while after you turn them off, as water droplets fall from the showerhead. However, if your shower keeps dripping for longer than expected, there could be something wrong with it.
Issues with showers vary in severity. You might only need to replace worn o-rings or washers, or serious cases could require replacing the entire inner mechanism of the shower.
In this article, you will learn how to fix a leaky shower faucet. We explain how to dismantle the faucet and repair or replace the faulty parts so you can enjoy your drip-free shower again.
Key Takeaways
- Identify the type of shower faucet: Single-handle or double-handle faucets require different repair methods.
- Turn off the water supply: Before starting any repair work, make sure to shut off the water supply to prevent accidents and flooding.
- Replace worn-out parts: Common issues include worn o-rings, washers, or cartridges that need to be replaced.
- Test your repair: After fixing the issue, turn the water supply back on and test the shower to ensure the leak is resolved.
Which Type of Shower Faucet Do You Have?
This article explains how to fix both single and double-handle shower faucets. Regardless of which type you have, there are a few important steps you need to take:
Warning
Step 1: Plan Your Repair
Decide on a suitable time for your repair and give your housemates some prior warning so they aren’t caught off guard.
Step 2: Drain the Water from the System
Drain any remaining water from the system by opening the hot and cold faucets in your bathroom and running the shower.
Step 3: Don’t Lose Parts
Cover your drain so no removed screws or parts can fall down it and be lost. Make sure you have a container to put small parts in, ready to be returned to the shower when you reassemble it.
Step 4: Clean the Faucet
Before taking more complicated steps, clean any build-up or debris on the faucet.
The easiest way to do this is by soaking a cloth in white vinegar and wrapping it around the affected areas to loosen any mineral deposits. You can then use a scourer or small brush to remove the build-ups, and then rinse it thoroughly.
How to Fix a Leaky Shower Faucet: Single Handle
What You Need
- Flathead screwdriver
- Phillips screwdriver
- Deep-welled socket wrench or cartridge puller
- Needle-nosed pliers
What To Do
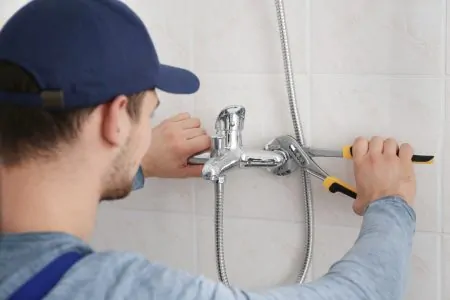
Step 1: Detach the Shower Faucet Handle
Locate the screw securing your faucet handle; it might be hidden by a decorative cap that can be popped out with a flathead screwdriver.
Use a Phillips screwdriver that fits the screw head and remove it. Some handles might have more than one screw. You should now be able to pull the handle off.
Step 2: Remove the Decorative Faceplate
Behind the handle, there should be a faceplate. Find and remove the screws holding it in place. Pull the faceplate off, gently wiggling it if it seems stuck to the wall.
Step 3: Pull off the Escutcheon
There is a metal sleeve that covers a shower valve. It resembles a pipe and should slide off quite easily. It might be screwed on, so loosen it and remove it.
Step 4: Take out the Locking Clip
Some shower faucets have a clip that holds the valves in place. If there is one, it will be metal and U-shaped, sticking out at the top of the valve.
This can be removed by lifting it upward with your needle-nosed pliers or prying it up with a flathead screwdriver.
Step 5: Loosen the Cartridge
There is a cartridge inside the faucet valve that controls the temperature and flow of water. It is cylindrical with a round metal piece sticking out of the end.
Place the socket wrench over the end and loosen it. If the wrench doesn’t grip the cartridge, size it down until it does.
Step 6: Pull out the Cartridge
Remove the cartridge from the valve. It might pull out with the wrench. If it doesn’t, use needle-nosed pliers to grip the end and pull it free.
Step 7: Get a New Cartridge
You might already know the model and type of cartridge in your faucet and have a replacement prepared. If not, take the removed cartridge to your local hardware or plumbing store to ensure you buy the right replacement.
Step 8: Install Your New Cartridge
Install the cartridge and tighten it by turning clockwise with your socket wrench. Be careful not to over-tighten it, as this can damage the cartridge or faucet.
Step 9: Reassemble Your Faucet
Reverse steps 1–4 to reassemble your shower faucet.
Step 10: Test Your Repair
Turn your water supply back on, then turn your shower on and off. If the leak persists, call a plumber.
Pro Tips
The following tips will help you through the DIY process:
1. Deep-Welled Socket Wrench
A deep-welled socket wrench can be fitted into holes to remove nuts and screws. They are widely available online or in hardware stores and come in a range of socket sizes.
2. Use a Hairdryer!
If your faucet handle won’t move when you try to pull it off, heat it with a hairdryer or hot water.
Remember, it might be hot, so protect your hands with a towel when you try to remove it after heating.
Alternatively, a lubricant such as WD40 might help you remove stubborn parts.
3. Check Your Owner’s Manual
Different shower brands often vary slightly in their components. Check the owner’s manual for your specific shower faucet to familiarize yourself with the parts.
The manual might also list the replacement parts you need, meaning you can buy them ahead of time.
How to Fix a Leaky Shower Faucet: Two-Handle
What You Need
- Flathead screwdriver
- Phillips screwdriver
- Deep-welled socket wrench
- Needle-nose pliers
- Heat-proof faucet grease
What To Do
Step 1: Determine Which Faucet is at Fault
Test which faucet is leaking by placing your hand under the showerhead to feel if the water is hot or cold.
It is possible that both need repairing. Start with whichever one you suspect is the problem, then repair the second one if the shower continues leaking.
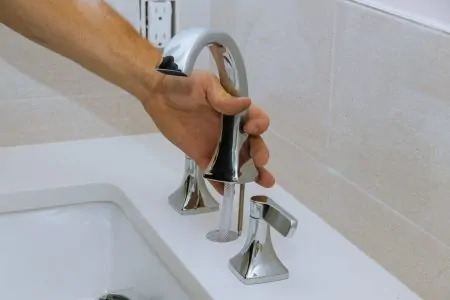
Step 2: Take off the Shower Faucet Handle
Locate the screw securing the faucet handle. It could be under a decorative cap, which you can pry off with a flathead screwdriver.
Use a Phillips screwdriver to take out the screw, then pull off the handle.
Step 3: Remove the Escutcheon
The escutcheon, or faceplate, sits against the wall behind the handle.
It will either have screws or be threaded. Remove the screws or unscrew the faceplate from the wall.
Step 4: Undo the Retaining Nut
Located over the stem of the valve, there is a hex nut that holds it in place.
Use your deep-welled socket wrench to loosen and remove the nut, rotating it counter-clockwise.
Step 5: Take out the Stem
Now that the retaining nut has been removed, you should be able to grasp the stem with your fingers and remove it.
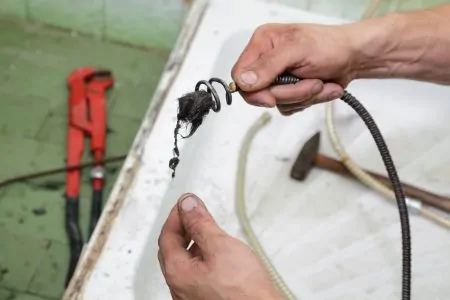
Step 6: Replace the Washers
At the base of the stem, there will be a rubber washer pressed onto it. Use pliers to remove this washer and replace it with a new one of the same size. Make sure you position it correctly.
Step 7: Grease the Washer
Use a heatproof grease or plumber’s grease to lubricate the washer. This will help provide a good seal and protect the washer.
Step 8: Inspect the Stem for Damage
It’s possible that the stem has worn down or been damaged. If this has happened, replace the entire stem. Remember to take your old one to the hardware store to get an exact match.
Step 9: Reassemble Your Faucet
Reverse steps 1–5 to put your faucet back together.
Step 10: Test Your Repair
Turn on your shower using only the faucet you repaired. If it is still leaking, fix the other faucet by following the same steps.
If the leak persists after fixing both faucets, you might need to enlist the help of a plumber.
Pro Tip
More Reasons and Fixes for Leaky Showers
It is possible that the reason for your leaky shower faucet lies with the head of the shower or diverter valve, rather than the faucet. Here are some ways to find and fix those leaks.
Unclog Your Shower Head
Holes blocked by limescale or mineral deposits in your showerhead can cause it to drip continuously. Water will be retained in the head of the shower and will slowly seep out.
What You Need
- Screwdriver
- White vinegar
- A container that is large enough for your shower head
- Plastic scrubbing brush
- Toothpick or nail
What To Do
Step 1: Turn off the Water Supply
Locate the shut-off valve to your bathroom and turn the water off. If you can’t find a dedicated valve, you may need to turn off the main supply to your property.
It’s a good idea to schedule this ahead of time, as you might be without water for a few hours.
Step 2: Remove the Showerhead
How you achieve this may vary depending on the brand. In general, you will need to undo some screws to pull the showerhead off.
You might have to remove the faceplate along with the showerhead.
Step 3: Soak the Head in Vinegar
Place your showerhead in a container and fill with a mixture of equal parts white vinegar and water. This will help break up the mineral deposits. Leave it to soak for an hour to loosen any mineral deposits.
Step 4: Clean the Head
Remove any remaining build-up by scrubbing with a plastic brush. You can use a nail or a toothpick to push deposits out of the holes in the showerhead.
Step 5: Replace the Parts
Reattach the showerhead, turn the water on and off, and test for leaks. If they persist, there must be another reason for the leak.
Pro Tip
Replace the Washer in the Showerhead
There is a washer inside your showerhead, which might have been worn down and needs replacing.
What You Need
- Screwdriver
- Wrench
What To Do
Step 1: Remove the Shower Head
Follow steps 1 and 2 of the previous fix to disconnect the water supply and detach it from the connecting pipes.
Step 2: Locate the Collar Nut
While models vary, there should be a nut attached to the arm of the shower. It resembles a standard metal nut but might be a little longer. It also has a neck that is wider in diameter than the body.
Step 3: Loosen the Collar Nut
Use a wrench to loosen the collar nut, then separate the showerhead from the shower arm.
Step 4: Locate the Swivel Ball and Washer
There will be a swivel ball that allows you to move the head of the shower directionally. Beneath this is the washer.
Step 5: Remove and Replace the Washer
Prise off the rubber washer, then replace it with one of the same thickness and size.
Step 6: Reassemble the Showerhead
Reverse steps 1 to 3 to put your showerhead back together and test your repair.
Pro Tips
- Collar nut: When removing the collar nut, protect the decorative finish by placing a cloth or some rubber between the wrench and the nut.
- Rainfall shower: With a fixed position overhead rainfall shower, the washer and o-rings are located in the pipe directly above it. There is often a butterfly screw that can be undone to remove the showerhead. The o-ring and washer are located at either end of this screw; one beneath it, and another inside the pipe.
Clean or Replace the Diverter Valve
The diverter valve lets you switch between water running from your shower head and the bathtub faucet. It is usually located between the hot and cold faucets. This valve can become clogged with mineral deposits and deteriorate.
Cleaning or replacing the diverter valve can fix this.
What You Need
- Flathead screwdriver
- Phillips screwdriver
- Wrench
- White vinegar
- Small wire brush
What To Do
Step 1: Shut off Your Water Supply
Turn off the water supply to your faucet, either in the bathroom or at the main supply to your property.
Step 2: Drain the Water
Open your bathroom faucets and let the water drain from the system.
Step 3: Take off the Diverter Handle
The handle of your diverter will resemble that of a faucet.
Find the retaining screw; it should be under a plastic cap. Prise off the cap with your flathead screwdriver, then use a Phillips screwdriver to release the handle. Pull the handle off.
Step 4: Remove the Diverter Valve
Beneath the handle is the diverter valve secured by a hex nut. Use your wrench to undo the nut and remove it.
Next, unscrew the diverter valve. If it’s stuck, use WD40 or wrap a white vinegar-soaked rag around it for a while.
Step 5: Examine the Diverter Valve
First, remove debris and build-up from the diverter valve using white vinegar and a wire brush. Once this is done, allow it to dry and look at it closely. Check for cracks or damage to the valve or washer — if there are signs of wear, replace them.
Step 6: Reassemble the Diverter Valve
Reverse steps 1 to 4 to put the parts back together.
Step 7: Restore your Water Supply
Turn the water back on and test your repair. If you still have drips, you might need a plumber to check it out for you.
Pro Tip
FAQs

Why Is My Shower Faucet Leaking From the Spout When Turned Off?
If your shower faucet is leaking from the spout after turning it off, there is likely an issue with the showerhead. This could be caused by a worn-out washer in the showerhead, meaning water is able to escape. There could be a build-up of sediment and minerals in the shower, which is holding water in the head after use and making it gradually seep out of the head. If fixing these issues doesn’t help, the problem might lie in the valve itself.

Why Is My Shower Handle Leaking?
If your shower knob is leaking or you notice water seeping out from the handle, there is an issue with the shower valve itself. This could be caused by a faulty or worn-out cartridge, which is relatively easy to replace, or it might simply be a case that a few screws or nuts need tightening. Unfortunately, if the simple fixes don’t make a difference, you might need to consult a plumber as valves can be complicated to fix.

Is Replacing a Shower Faucet Easy?
If DIY fixes don’t help or you feel the need to replace your entire shower valve, this is a job best left to the professionals. In comparison to replacing a faucet attached to your sink, which is straightforward, shower faucets are usually attached to the wall directly. To avoid making a mess, unless you are an experienced DIYer, you would be best served by calling a local plumber.

Why Does My Shower Faucet Leak Only Sometimes?
If your shower only leaks sometimes, it could be caused by a hole in the water pipers. There is a possibility that your shower is leaking in unpredictable ways as a result of corroded or clogged parts brought on by hard water mineral buildup.
Another potential cause is worn-out gaskets or inner seals. Water will slowly leak out or squirt out of the system as the rubber O-rings that connect the moving metal pieces begin to wear down, which often happens over time with regular use.

How Do I Shut the Water Off to My Shower?
You must locate the supply valve to shut the water off your shower. Regarding showers and bathtubs, you should search the area around the shower or bathtub for an access panel. It may be on the opposite side of the wall from the bathtub or shower.
If you can’t find this valve behind the access panel, you have to look for it either in a ceiling access panel on the floor below or in the basement.
Shower bodies normally have built-in valves to cut off the water supply. Once the escutcheon plate has been removed, you will have access to them.
It depends on whether the contractor bought and fitted a valve with stops. This is a requirement in any building that is over three stories tall.

How Much Does a Plumber Charge to Fix a Leaky Shower Faucet?
Plumbers charge between $50 and $300 to fix a leaky shower faucet. Most homeowners usually pay around $150 to have their shower faucets repaired.
Many shower faucets are available, including diverter or compression faucets. Because some faucets are less challenging to work with and more straightforward to repair than others, the kind might directly affect how much it will cost to remedy the leak.
When a shower springs a leak, it could be caused by several different components. Problems with cartridges, washers, and valves can all result in leaks in the system. The price of fixing your leaky shower may change depending on the issue and the work required to solve it.
Checking Out Your Handiwork
You now know how to stop a shower faucet from leaking, so go ahead and give it a try. Preventing leaks will help you save money that is otherwise wasted as water drips down the drain (1). Hopefully, these fixes also mean you won’t need to pay for a professional plumber.
Still, if the fixes don’t help or you have any doubt that you should be working on your shower faucet, don’t hesitate to contact a plumber. They will know how to stop a dripping shower faucet as effectively as possible.
When dealing with a leaking shower faucet, it’s best to use a process of elimination and try the quick fixes first. Work your way back from the showerhead to the valves in the faucets.
This could save you a lot of time and money if it is only a washer that needs replacing.