Can you spray paint a car? Hell yeah! Should you spray paint a car? It depends on the amount of prep work you undertake. Cutting corners will only leave you with an amateurish paint job.
Spray painting a car may seem like a great idea initially, but it involves more than just holding down the spray can and hoping for the best. We explain that you can paint a car with spray paint and offer tips for the best results.
Key Takeaways
- Prep work is crucial: Clean, sand, and apply primer to the car for better paint adhesion.
- Choose the right paint: Consider water-based, acrylic enamel, acrylic urethane, or 2K paints for the best results.
- Apply multiple thin layers: Use at least three coats of paint, allowing time to dry between each, for a smoother finish.
- Protect with clear coat: Apply a clear coat to protect the paint from UV rays and add a glossy finish.
Can You Spray Paint a Car?
Can you paint a car with spray paint? You can, but only if you have a safe and well-ventilated space to do the work. Spray paint works best in warm and dry conditions, and if you want the best finish, you’ll want it to perform.
Your chosen space should be ventilated but covered to protect the freshly painted surface from dust and debris. The last thing you’d want is for the paint to dry with grit stuck to the surface. You should also wear goggles, a face mask, and old clothes.
Covering small surfaces is easy, but if you want to spray paint an entire vehicle, you may be better off calling a professional. The same is true if you have significant rust patches requiring attention.
Best Spray Paint for Cars
Doing the prep work and sourcing a well-ventilated space is only part of the task. Using the wrong paints will also scupper your efforts. Which paints are best? Let’s find out.
Water-Based Paint
Water-based paint is widely used in the auto industry. It is environmentally safe, washes clean with soap and water, and gives off low VOCs (volatile organic compounds). VOCs release low-level ozone as the paint dries, which is bad for the planet.
The only tricky thing with water-based spray paint is it is a challenge to get the mixed quantities right. You also need to apply a lacquer to protect the color because it is not as hard-wearing as other products.
Nitrocellulose Paint
Nitrocellulose paint is an excellent product for restoring classic vehicles. It will hold its color and shine for longer, keeping your car looking as good as new.
However, nitrocellulose paints are highly toxic, contain high VOC levels, and have a strong odor. Nitrocellulose paints are unavailable in some states, like California, because they damage the environment.
Because nitrocellulose paints are so toxic, it is not recommended for use at home. You may have to choose another product to complete your DIY respray.
Acrylic Enamel Paint
Acrylic enamel paint is compatible with spray machines, like this Graco Magnum model, but it also comes in aerosol form. Because it comes in cans, it’s also a great paint for small touch-up jobs like scratches.
It dries to a high shine and is hard-wearing, but it dries harder with heat treatment.
Acrylic Urethane Paint
Acrylic urethane paint dries as hard as the toughest enamels and comes in either water or solvent-based formulas. It dries quickly and forms a hard shell. You can get this paint in single-stage or dual-stage.
Single-stage is paint and primer in one, while dual-stage requires separate applications of primer and paint.
2K Paint
The aerospace and aviation industry uses 2K paint because it is one of the toughest color coatings on the planet. It uses an epoxy-based formula to get a high-gloss finish and dries to a rock-hard shell thanks to an added hardener.
This paint is not cheap and highly toxic, so you should take extreme care when using it. Wear goggles and a respirator with a HEPA filter, and only work in a well-ventilated area.
How Many Spray Cans to Paint a Car?
To answer this question, we need to look at the different types of vehicles. Small cars should take between eight and 12 500mm cans of spray paint, whereas a 4×4 will take 12 to 15 cans.
A van or a truck could use as many as 18 to 22 500mm cans.
How to Paint a Car at Home
- Painter’s tape.
- Epoxy metal putty.
- Putty knife.
- Cellulose thinner.
- Paper.
- 600 and 1200-grit wet and dry sandpaper.
- Primer.
- Spray paint.
- Clear paint.
- Face mask.
- Goggles.
- Old clothes.
- Cloth.
- Towel.
- Warm soapy water.
Preparing the Car
Preparation is the key to success here. Without it, everything you do will look poorly executed and spoil the end result.
1. Sand the Surface
Start by sanding the affected area with 600-grit sandpaper. The paint will start to scrape away, revealing the primer layer beneath. Now switch to the 1200-grit paper to get a smoother finish.
Top Tip
Ensure that any rust patches are removed, returning the surface back to bare metal. It may take longer, but it is worth it for a better finish.
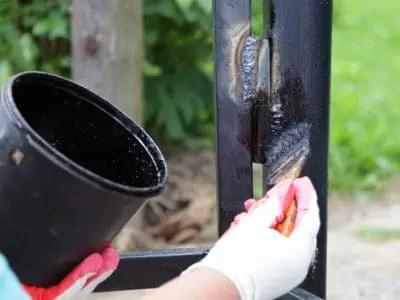
2. Fix Holes
Sometimes rust can leave tiny holes when rubbed away. Grab some epoxy metal putty, like this Loctite All-Purpose Repair Putty, and fill any small gaps. You can use a putty knife to smooth the surfaces.
Wait for an hour while the putty dries, then rub it smooth with 1200-grit sandpaper.
3. Wipe Clean
Wipe the surface clean using a dry cloth. Use cellulose thinner to remove any stubborn wax or grease. This Sunnyside is a great product because it’s inexpensive and readily available.
Wipe it over the surface in small quantities because it is very effective. Only work on the section you want, or you’ll risk removing paint from other car areas.
Take Care
Only use thinner in well-ventilated areas because it gives off strong odors.
4. Use Paper and Tape
Cover the areas nearest to where you want to work with painter’s tape and paper. It reduces overspray damage and helps you focus on the affected area. This 10-pack of painter’s tape is good value for money and is available online or at hardware stores.
Cover large areas, like windows, with multiple sheets of paper, and remember to cover non-metal surfaces like bumpers. It’s also a great idea to lay paper beneath the car to avoid spray painting the surface below.
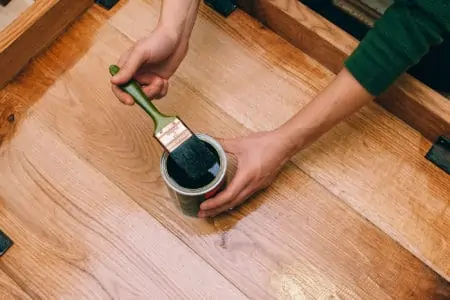
Priming the Car
So, now the prep work is done, it’s time to lay down a primer layer. This stage is crucial because you want it to bond when the paint goes on.
1. Choose a Well-Ventilated Area
Choose a ventilated area to perform the paint job. Aerosols work better in dry and warm locations, but also give off strong odors. Keep the car away from anything you want to avoid getting paint on.
Wear goggles and a respirator to protect you from the fumes.
2. Apply the Primer
Using a primer, like this Zinsser 1-2-3, helps get an even coating and gives the paint a strong adherence. Hold the can 25cm away from the affected surface and lay down the first layer.
Work in slow sweeping motions to get the best coverage. Wait 15 minutes before applying the next layer. Finally, after another 15 minutes, lay down the third coat of primer.
Leave the surface to dry for 24 hours before sanding.
3. Sand Between Coats
If you want the paint job to look professional, sand between the primer and topcoat. Wet the 1200-grit sandpaper and rub it over the primed area until it is smooth.
4. Clean the Area
Wipe down the sanded area with a cloth and warm soapy water. Rinse down the car to remove soap residue and wait while it air dries.
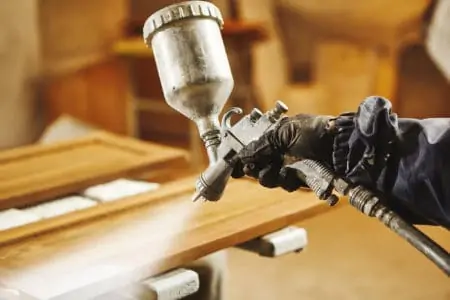
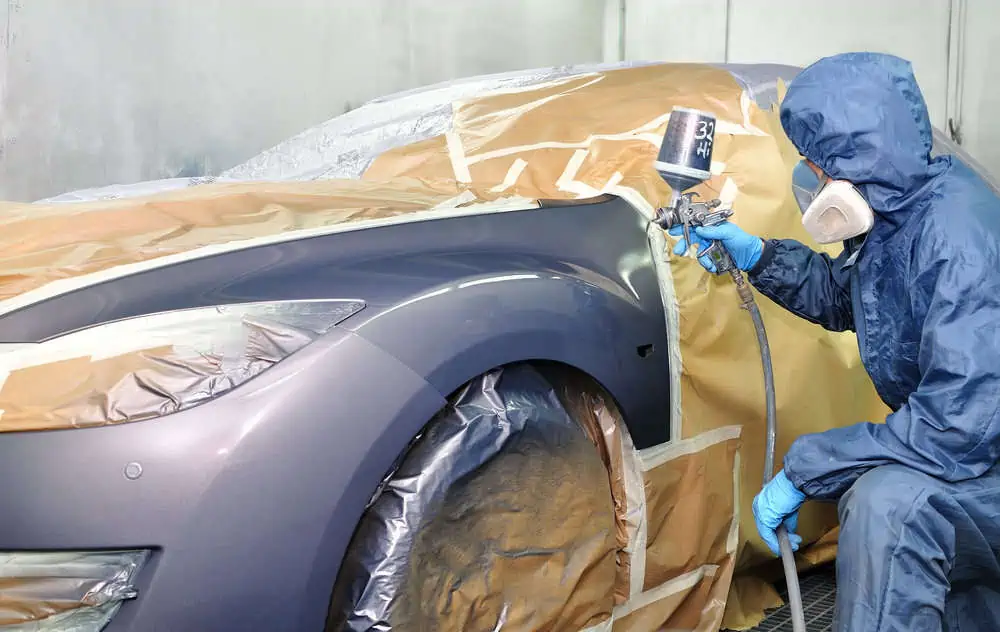
Spraying the Car
Now for the fun bit. All that prep and sanding can seem labor-intensive, but it’s all worth it in the end.
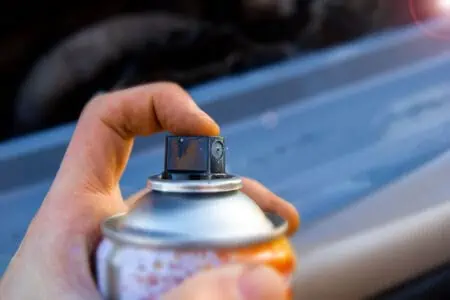
1. Shake the Can
Paint pigments separate if the can is left to stand. Shaking it for three minutes mixes the pigments to get the most even application. If you’ve used the spray can in the last 12 hours, you only need to shake it for one minute.
2. Test the Paint
Grab an old piece of cardboard and test how the paint covers it. Hold the can at 25cm, press the button, and look for patches and uneven layers. It also helps you get a feel for how the paint can perform before you work on the car.
If the paint is patchy, it could mean that you’ve failed to shake the can properly. Shaking it for another minute or two should solve the problem.
3. Apply the Paint
Work in horizontal stripes, moving from left to right, holding the can 25cm from the car’s surface. Move at a steady and consistent speed, ensuring the surface gets an even dusting of paint.
Apply a minimum of three coats, allowing 10 minutes between layers. This ensures the bottom layer is slightly tacky, enabling the paint to adhere better. Wait at least 30 minutes before moving on to the next stage.
Important Point
It’s better to lay down several thin layers rather than a couple of thick coats. The paint builds in layers, and dries harder and faster.
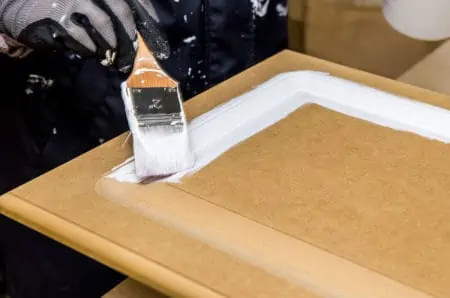
4. Apply the Clear Coat
Using the same technique as the spray paint, apply the clear coat in horizontal motions. Once you have an even layer, allow 24 hours while it dries. Products like this Krylon Clear protect your paintwork against UV damage.
Can You Spray Paint a Car Without Sanding?
You should always sand rust and orange peel paintwork before proceeding with your respray. If you try to match colors, using a spray gun delivers superior results and may mask some surface imperfections.
Also, the colors you choose make imperfections stand out. Black is the best exterior color to mask blemishes because it doesn’t reflect light. The only problem is it soaks up UV from the sun, making it tricky to stay cool in the summer.
However, sand between coats for the smoothest results if you want your repairs to blend in.
How to Make a Spray Can Paint Job Look Good
If you paint cars for a living, you will know the tips and techniques for the best results. The rest of us could make our lives easier by copying the pros.
Paint Full Panels
Just like painting a wall, always complete a full panel before quitting. If you stop halfway through when you return to paint, you will have bold lines and a dry edge. It creates ridges in your otherwise smooth paint job.
Feather Layers
Feathering is a simple process of leaving undefined lines between each layer of paint. It helps to merge two borders without leaving visible lines.
Use Lacquer or Clear Coat
Topping off your paint job with lacquer or a clear coat enables you to add a high sheen to the surface and protect against pigment fading in the harsh UV light. It also guards against stones and chips when you drive the car.
Build Good Foundations
Your paintwork is only as good as the layers beneath the paint. Even though the eye can’t see it, your primer, sanding, and prep work make your paintwork look more professional.
FAQs

Can You Touch Up a Car With Spray Paint?
Spray paint is the ideal product to use when touching up a car, as long as you color match first. Aerosol paints are designed to cover small areas, making them the ideal way of painting scratches and scuffs.

How Long After a Car is Painted Can You Drive It?
You should leave a gap of 24 hours before you drive your freshly painted car. It gives the paint time to bond and set.

Can You Spray Paint a Car With Rust-Oleum?
Rust-Oleum makes a good range of paints, suitable for respraying a car. This Satin Protect Enamel is an excellent example of some of the colors that Rust-Oleum makes.

How Hard is it to Strip Spray Paint Off a Car?
Stripping paint from a car is easy enough. Simply brush on a paint stripper, like this Smart Strip Advanced, and wait while the surface starts to blister. You can then wipe it off with a rag.
Take Note
Remember that paint remover will strip all layers of paint, returning it to bare metal.
Spray Away
Spray painting a car can be a lot of fun. You can unleash your creative side and marvel at the finished results, feeling proud you did it yourself.
How your car looks on the outside is also important to some people; it creates an image and makes a statement about you.
So, with car painting added to your skillset, why shouldn’t your vehicle look pristine?