When surrounded by tired and faded woodwork, painting over stained wood is an excellent way to bring old furniture back to life. It takes time and a little patience, but the results are well worth it.
So, if you are unsure about how you can paint over stain, we can show you the best method and recommend the best products to get the job done.
Key Takeaways
- Prepare the wood by cleaning, sanding, and filling holes and gaps.
- Apply a primer that matches the type of paint (oil or water-based) you plan to use.
- Caulk any gaps or seams after priming for a smooth finish.
- Paint the wood with multiple layers, allowing each coat to dry before applying the next.
Can You Paint Over Stained Wood?
You can paint over stained wood, but the type of stain you have and the paint you use will have an effect on the finished product. You also need to invest the time to prepare the surface because if you skip this part, the tannins in the stain will seep into the fresh paint layer, causing it to discolor.
How To Paint over Stain
When it comes to painting over stain, never underestimate the power of good prep work. Taking the time to make the wooden surface suitable for the paint to adhere to will result in a more robust finish that stands the test of time.
It also helps if you have the right tools to get the task completed efficiently.
What You’ll Need
- Painters tape.
- Drop cloths.
- TSP (Trisodium phosphate).
- Deglosser.
- Wood filler.
- Caulk and caulk gun.
- Clean rag.
- Paintbrush.
- Roller and frame.
- Paint tray.
- Primer.
- Topcoat paint.
- 150-grit sandpaper.
- Tack cloth.
- Face mask and goggles.
1. Determine If You Are Dealing With Water or Oil-Based Stain
There is a simple way to tell if you are dealing with water or oil-based stain: sprinkle some droplets of water onto the surface and wait a couple of minutes. If the water starts to bead on the wood surface, it is an oil-based stain because oil repels water.
2. Prepare The Wood
Safety First
Clean the surface using warm water and dish soap to remove any dust or cobwebs. Grab some 150-grit sandpaper, like this Lahnu Contractor’s Pack, and work with the grain to avoid cross-hatching later down the line.
Cross-hatching occurs when you can see etched lines in the wood that run across rather than with the direction of the grain. When the paint settles, these lines appear, leaving an uneven surface.
Use the tack cloth to remove the sawdust. If the staining and dirt are too stubborn, use TSP, and if that doesn’t work, deglosser will do the trick. This Sunnyside Citrus-based deglosser is very effective and cleans up with soap and water. It’s worth checking if TSP is available in your state, as its sale is prohibited in some parts of the country.
Dip a rag in the deglosser, wipe it over the wooden surface and wait for 30 minutes. It will break down the layer of stain, dissolving any grease spots that may still exist. Wipe it clean with soap and water and wait while the surface dries.
Fill any holes and gaps using wood filler and then sand it once dry to smooth the surface. Wipe away the dust with a tack cloth.
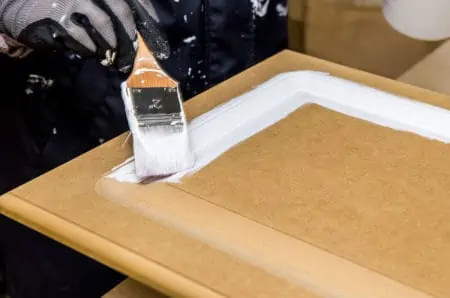
3. Apply a Primer
Once you are satisfied that the surface is smooth and completely dry, it’s time to prime. This KILZ Latex Primer is an excellent oil-based product to use. Latex primers can be water or oil-based, so it is vital that you use the correct topcoat.
For example, if you use an oil primer, the topcoat should be oil-based and if you use a water-based latex or acrylic primer, the topcoat should follow the same formula. This Zinsser Bulls Eye 1-2-3 All Surface Primer is an excellent example of a water-based paint.
For exterior woodwork, oil-based products are better at repelling UV and rainwater and water-based latex primers work best with water-based stains.
When painting doors, tables, and cabinets with a larger surface area, use a roller to get even coverage.
The primer is used as a layer to cover and prepare the dark wood, allowing you to use a lighter color on top. It also seals the wood surface, making it less porous, so the paint adheres better. Use the painter’s tape to block off areas where you want to control the flow of the paint.
Apply two coats of primer, waiting the recommended time for it to dry between layers.
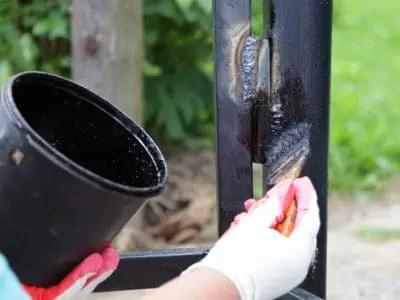
4. Caulk The Gaps
Load the caulk tube into the gun and cut the end off the nozzle at a 45-degree angle. Locate the gaps and run a thin line of caulk along the edge, applying gentle but firm pressure on the gun’s trigger. To release the pressure, flick the clip at the base of the gun, and the caulk will stop flowing.
When you have finished each bead (line of caulk), wet your finger or use a damp cloth and smooth the caulk into the gaps and leave it to dry. Silicone caulk is touch-dry in 30 minutes, whereas polyurethane caulk can take a maximum of 10 days to cure fully.
Top Tip
Always start in the corners when caulking because it gives you a smoother finish.
Now you are ready to paint.
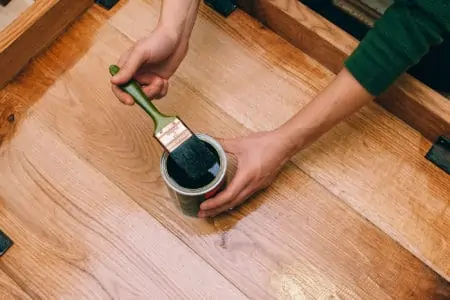
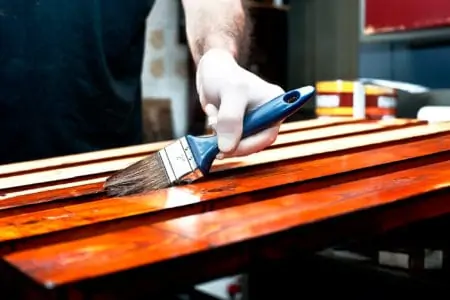
5. Paint The Wood
Several types of paint are available, with each offering a different finish to suit your project. If you are restoring a cabinet and want a distressed look, chalk paint like this Rust-Oleum Ultra-Matte is probably your best option. It dries to a flat finish and can be sanded to reveal the underlayer to make it look well-worn.
For interior door frames, this Rust-Oleum Painter’s Touch Ultra-Cover paint is a good choice. It is latex-based, so it cleans up with soapy water, and the binders and resins in the gloss give you a durable surface for high-traffic areas.
Remember
Oil-based paint works with oil-based primer and is more suitable for high-traffic areas.It also handles exterior woodwork better because it protects against damaging UV light and repels moisture.
For the first layer of the topcoat, you can use a roller or a brush. If your project is substantial, the roller will get the task completed faster.
6. Apply a Topcoat
When the first layer of paint is dry, it’s time to lay down the topcoat. If you want an ultra-smooth finish, you can use 150-grit sandpaper to remove any slight imperfections on the first layer of paint. Use the tack cloth to wipe away the sawdust.
The number of coats you apply depends on the object you are painting. For interior furniture, two coats of paint are sufficient, but for wooden sidings, fencing, and decking, as well as exterior furniture, you can lay down as many as six coats.
If you are using oil-based paint like this KILZ Exterior Siding and Barn paint, you should wait up to eight hours for it to dry. Water-based paint like Varathane Ultimate Polyurethane dries in as little as two hours.
Use the paintbrush if you want the smoothest possible finish, but watch out for stray bristles in the paint. Work in long, straight strokes moving from one edge to the other.
Top Tip
Never start in the middle, as this will leave brush marks.
Leave the top coat to dry for 24 hours before use.
Tips and Tricks for Painting Over Stained Wood
The professionals have several hints and tips to make your painting project more manageable. Learning how to paint like a pro is a steep learning curve, so knowing a few shortcuts and hacks is beneficial to the novices out there and even one or two experienced decorators.
Learn The Art of Cutting In
Cutting in takes a steady hand and bravery because you could ruin the entire piece if you go wrong. The secret is not to overload the brush and to grip the handle properly. Place four fingers on the handle and your thumb nearest the ferrule (the metal bit that holds the bristles).
Think of it like gripping a knife, and you’ll get the idea. Hold the brush at 45 degrees and work the bristles into the corner or edge, moving downward in a slow and steady motion.
You could also use a specialist angled brush for even neater lines.
Use Spray Paint
Spray paint is an easy way to get a super-smooth finish because the nozzle distributes paint evenly, leaving no visible marks as a brush or roller would.
Keep In Mind
Spray painting causes overspray because you can’t control precisely where the paint adheres. For this reason, it is probably a good idea to work outdoors.
Learn The Art of Dry Brushing
When you use a roller to lay down paint, it dries with a stippled effect on the surface. It is noticeable if you run your hand over the wood and feel small lumps and bumps. You want the smoothest finish possible for tabletops and cabinets, and dry brushing is the perfect technique.
Run the roller over the surface for even coverage, and then use a dry paintbrush to drag the bristles lightly over the wet paint, working from top to bottom. Hold the brush at 45 degrees and use long, straight strokes. You will see the stippled paint start to smooth out with each stroke of the brush.
After each pass, dry the bristles on a clean rag to remove excess paint and repeat the process until you have covered the entire surface.
Always Caulk After Priming
You might think you should apply the caulk before laying down the primer, but that would be wrong. Caulk doesn’t need priming, and it can be smoothed easily using a wet finger. Also, it is paintable when it dries, so the topcoat will adhere to the caulk without any surface preparation.
Caulking after priming is a good idea because primer is typically white, so it reveals gaps that you might not have spotted. It also makes it easier to see where the caulk needs to go.
FAQs

How Do You Tell If Wood is Painted or Stained?
If the wood is painted, it will have a colored surface, whereas staining changes the color of the wood but only enough to bring out the wood grain. Also, look for peeling and flaking as a sign that it is paint. Staining generally doesn’t change the aesthetics of the wood, it just enhances its appearance, and it rarely peels or flakes.

Can You Paint Over Stain Without Sanding?
The easiest way to paint over stain is to use a deglosser, which is essentially liquid sandpaper. It removes the gloss shine and prepares the surface so that primer and paint adhere.

Can You Remove the Stain Completely?
You can if you use a chemical stripper that layers onto the wooden surface and dissolves the stain. Strippers are caustic, so you need to take safety precautions and wear gloves, a face mask, and goggles.
You can also use a deglosser, or if you fancy the workout, sanding should get you the same results.

Can I Use Acrylic Paint to Paint Over Stain?
You can use acrylic paint over wood stain, but it is better to remove the stain before painting for the best results. You would also need many coats for the paint to adhere to.
Paint Perfection
Painting over stain is achievable, but only if you put in the prep-work first. The more attention you give to the pre-painting stages, the better the outcomes. The actual painting bit is easy once the primer has cured and sealed the wood to reduce porosity.
So, rather than call in the professionals, grab a brush and give it a go. What have you got to lose?